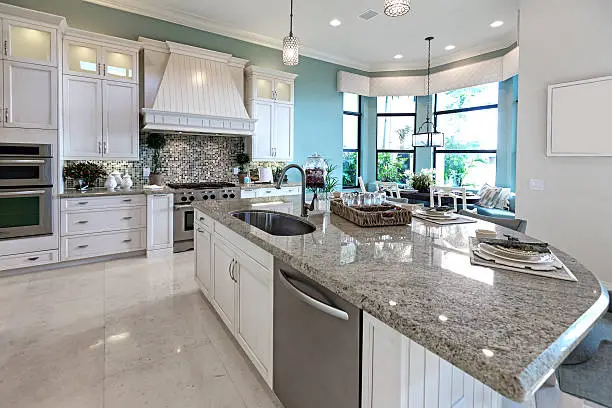

Granite countertops are favored for their durability and classic look, but they can develop cracks and chips over time. Addressing these issues quickly is crucial to avoid further damage. This guide provides a comprehensive approach how to repair granite cracks?, including techniques for filling hairline cracks and chips, reattaching broken pieces, and preventing future problems.
By following these steps, you can restore the beauty and functionality of your granite surfaces, whether you’re tackling minor imperfections or more significant damage. With proper repair methods, your granite countertops can remain both aesthetically pleasing and durable for years to come.

1. Filling Hairline Cracks and Chips
Determine Whether the Crack or Chip Needs to Be Repaired
Before beginning repairs on granite countertops, first assess the damage’s severity. Minor hairline cracks or small chips may not require immediate attention if they don’t impact the countertop’s structural integrity or appearance significantly.
However, addressing even minor imperfections is recommended. Repairing small cracks or chips helps maintain the countertop’s durability and overall look. Left untreated, these issues can worsen over time, potentially leading to more extensive damage.
Regular maintenance not only preserves the countertop’s aesthetic appeal but also ensures its longevity, preventing minor flaws from escalating into larger problems.
Collect Matching Granite Dust
To achieve a seamless granite repair, it’s crucial to use granite dust that matches the color and pattern of your countertop. To collect this dust, you can sand a small, hidden section of your granite surface, or you may choose to purchase a granite repair kit designed to provide matching dust.
The key is to ensure that the dust closely matches the original granite in both hue and pattern. This will help you achieve a natural-looking repair, blending seamlessly with the rest of the countertop and maintaining its overall aesthetic.
Mask Off the Area
To begin your repair, first mask off the area around the crack or chip using painter’s tape. This step is crucial for maintaining a clean repair site. By applying painter’s tape around the damaged area, you prevent the epoxy from spreading onto surrounding surfaces, ensuring a neat and professional finish.
Press the tape down firmly along the edges to avoid any seepage of the epoxy, which could create a mess and ruin the surrounding area. This precautionary measure helps to keep your repair precise and contained, making the final result look clean and polished.
Mix 2-Part Epoxy and the Granite Dust
To repair granite cracks, use a two-part epoxy. Begin by mixing the epoxy resin and hardener as directed by the manufacturer. Once mixed, slowly incorporate granite dust into the epoxy until the blend resembles the texture and color of the surrounding granite.
The resulting mixture will fill the crack and seamlessly blend with the existing countertop, providing a durable and aesthetically pleasing repair. This method ensures that the fix not only addresses the damage but also maintains the visual continuity of the granite surface.
Apply the Epoxy
To apply epoxy to a crack or chip, start by using a small applicator or putty knife to spread the mixed epoxy over the damaged area. Make sure the epoxy completely fills the crack or chip and is evenly distributed.
Smooth the epoxy to blend it with the surrounding surface of the granite. For larger chips, apply the epoxy in layers, allowing each layer to dry before adding the next. This method ensures a more even and durable repair.
2. Reattaching Broken Pieces
Support the Broken Section
To fix a cracked granite countertop where a piece has detached, start by supporting the broken section to prevent movement. Place wooden blocks or shims under the detached piece to hold it firmly in place. This support ensures that the granite stays stable and aligned during the repair process.
Properly supporting the section is crucial for achieving a strong, lasting bond when you apply epoxy. Without this support, the granite might shift, compromising the effectiveness of the repair and potentially causing further damage. By securing the broken piece with blocks or shims, you set the stage for a smooth and successful repair job.
Tape Off All Surrounding Surfaces
Tape off all surrounding surfaces before applying epoxy to safeguard them from drips and spills. This process is akin to preparing for crack filling, applying tape carefully around the edges and adjacent areas prevents epoxy from accidentally sleeping on parts of the countertop where it’s not wanted.
Make sure the tape adheres securely to create a protective barrier. This will help keep your workspace clean and ensure that only the intended areas receive the epoxy treatment, resulting in a neater and more professional finish.
Clean All of the Connecting Surfaces
To ensure a strong bond when reattaching surfaces, it’s crucial to start with a clean foundation. First, thoroughly clean both surfaces that will be joined. Remove all dust, debris, or any remnants of old adhesive to prevent interference with the new bond.
Use a mild detergent mixed with water to wash the surfaces, making sure to scrub gently but thoroughly. After cleaning, rinse off any soap residue and let the surfaces dry completely.
This preparation step is essential as any remaining particles or moisture can weaken the adhesion, leading to a less secure attachment. Taking the time to properly clean and dry the surfaces will help ensure a durable and effective bond.
Mix the Epoxy with Matching Granite Dust
To reattach broken granite pieces, mix epoxy resin and hardener with granite dust that matches the stone. This process is similar to filling cracks. The granite dust is crucial because it allows the epoxy to blend seamlessly with the existing granite, resulting in a more uniform and natural appearance.
By incorporating the dust, the repair is less noticeable, and the restored piece maintains the aesthetic integrity of the original granite. This technique ensures a cohesive and durable fix, effectively making the repaired area as strong and visually consistent as the surrounding stone.
Apply the First Coat of Epoxy
Start by preparing the epoxy mixture according to the manufacturer’s instructions. Once mixed, generously apply the epoxy to one of the surfaces needing repair. This initial coat acts as a bonding agent, ensuring a strong and lasting hold.
Use a brush or applicator to spread the epoxy evenly, making sure it covers the entire area where the broken piece will be reattached. This thorough coverage is crucial for maximum adhesion and durability.
Pay special attention to edges and corners, as these areas are prone to stress and separation. Allow the epoxy to set slightly if the instructions advise, but be prepared to attach the broken piece while the epoxy is still tacky for optimal bonding.
Shim and Tape the Area
To repair a broken piece, start by aligning it with the prepared surface. Press the piece into place carefully, ensuring it fits correctly. Use shims—small, wedge-shaped supports—to hold it securely in position. These shims help maintain alignment and stability.
Once the piece is steady, apply tape around its edges. This tape prevents any movement, ensuring the piece stays aligned as the epoxy sets. The epoxy, a strong adhesive, needs time to cure (harden) properly.
During this curing period, the tape and shims work together to keep the piece from shifting, resulting in a seamless and strong repair.
Apply a Second Coat of Epoxy
After aligning and securing the broken piece, apply a second coat of epoxy over the seam. This step is crucial as it fills any remaining gaps and strengthens the bond between the broken pieces. To ensure a smooth and seamless finish, carefully spread the epoxy over the seam, blending it with the surrounding countertop surface.
Use a fine brush or a plastic spreader to evenly distribute the epoxy, eliminating air bubbles and ensuring it adheres well. Once applied, allow the epoxy to cure completely, as per the manufacturer’s instructions, before using the countertop again.
This second coat not only enhances the durability of the repair but also helps in achieving a nearly invisible seam, restoring the countertop’s original appearance and functionality.
3. Finishing Crack Repairs or Reattachments
Allow the Epoxy to Dry
Allowing the epoxy to dry properly is crucial for a strong, durable repair. Always follow the manufacturer’s instructions for drying time, which typically means waiting at least 24 hours for the epoxy to fully cure. During this period, it’s important to avoid using or touching the repaired area to ensure that the epoxy sets correctly.
Premature use can compromise the bond and effectiveness of the repair, leading to potential damage or the need for reapplication. Proper drying ensures the epoxy reaches its maximum strength and durability, providing a reliable and lasting fix.
Clean and Buff the Surface
Once the epoxy has fully cured, start by removing the painter’s tape. Use a razor blade or fine-grit sandpaper to carefully eliminate any excess epoxy. Next, clean the surface with a mild cleaner to remove any leftover residue.
This step ensures that the surface is free from any contaminants that might dull the finish. After cleaning, use a soft cloth to buff the area. Buffing helps to restore the shine, making the surface look polished and new. This process not only enhances the appearance but also ensures the durability of the epoxy finish.
Use Tin Oxide to Shine the Surface
To achieve a final, glossy finish on your repaired granite, use tin oxide polish. Tin oxide is a fine abrasive known for its effectiveness in restoring the original luster of granite surfaces. To apply, use a clean, soft cloth and a small amount of tin oxide.
Gently buff the repaired area in a circular motion. This process will gradually enhance the shine, bringing the surface back to its original, glossy state. Consistent, gentle buffing ensures an even finish, making the granite look as good as new.
4. Preventing Cracks Through Proper Installation
Support the Underside of the Countertop
Properly supporting the underside of a granite countertop is crucial to prevent future cracks. During installation, ensure the weight of the countertop is evenly distributed by using sturdy supports or brackets.
This helps avoid stress points that can lead to cracks over time. Typically, the cabinets below the countertop provide support, but additional reinforcements are often needed, especially in areas with overhangs or weaker sections.
Use materials like metal brackets, wood beams, or corbels to provide extra strength. Proper support ensures the longevity and durability of the granite, maintaining its appearance and functionality for years to come.
Apply Rods Along the Underside of Cut Out Edges
When installing countertops with cutouts for sinks or cooktops, it’s crucial to reinforce these areas to prevent stress and cracks. Applying metal rods along the underside of these cutout edges provides the necessary support. These rods distribute the weight and stress more evenly, reducing the risk of fractures that can occur due to heavy use or sudden impacts.
To do this, insert the metal rods into grooves cut into the underside of the countertop, then secure them with epoxy or another strong adhesive. This reinforcement method ensures that the integrity and durability of your countertop are maintained, especially in high-stress areas around sinks and cooktops.
Have an Experienced Professional Install Your Granite
Having a professional install your granite countertop is crucial to prevent cracks. Experienced installers know how to properly support and secure granite, minimizing the risk of damage. They ensure the countertop is level and evenly distributed, preventing stress points that can lead to cracks.
Professionals also use the right tools and techniques, avoiding common mistakes that can compromise the granite’s integrity. Additionally, they can identify and address potential issues during installation, providing peace of mind that your investment is well-protected.
In the long run, professional installation can save you time, money, and the hassle of repairs, ensuring your granite countertop remains beautiful and durable.
Conclusion
Repairing granite cracks can seem daunting, but with the right tools and techniques, you can achieve a perfect fix. Whether you’re dealing with hairline cracks or reattaching broken pieces, following these step-by-step instructions will help you restore your granite countertops to their original beauty.
Remember, proper maintenance and installation are key to preventing future issues and ensuring that your granite countertops remain a stunning and durable feature in your home. Feel free to contact us for any type of query or service related to granite repair.
FAQs
What Types Of Damage Can Be Repaired On Granite Surfaces?
Professional granite repair services can address a wide range of issues, including cracks, chips, scratches, stains, etching, and uneven surfaces.
Can I Repair Granite Myself, Or Do I Need Professional Help?
While minor repairs like small chips or scratches can sometimes be addressed with DIY kits, it’s generally recommended to seek professional help for significant damage or intricate repairs to ensure the best results and avoid further damage to the granite.
How Long Does Granite Repair Take?
The duration of granite repair depends on the extent of the damage and the specific repair method used. Minor repairs may take just a few hours, while more extensive repairs could take several days.
How Much Does Granite Repair Cost?
The cost of granite repair varies depending on factors such as the extent of the damage, the type of repair needed, and the location of the granite surface. It’s best to contact a professional repair service for an accurate cost estimate.
Will Repaired Granite Look The Same As Before?
Professional granite repair technicians use specialized techniques and materials to ensure that the repaired area blends seamlessly with the rest of the surface, resulting in a restored appearance that closely matches the original.
Can All Types Of Granite Damage Be Repaired?
While many types of damage can be repaired effectively, there may be limitations depending on the severity and location of the damage. It’s best to consult with a professional technician to determine the feasibility of repair for specific issues.