Paver sealing is a transformative process that not only enhances the beauty of your outdoor surfaces but also safeguards them against wear and tear caused by weather, foot traffic, and time. By applying a protective sealant, you create a barrier that prevents moisture penetration, fading, and staining, keeping your pavers looking vibrant and new for years to come. Whether you have a driveway, patio, or walkway, sealing adds a polished finish that elevates the overall curb appeal of your property.
For homeowners considering paver sealing, many questions naturally arise: Should you seal your pavers? What’s the best method to achieve professional results? Are certain finishes more durable than others? Addressing these concerns is key to understanding how to maximize the longevity and beauty of your pavers. With the right approach and timing, sealing is a straightforward way to protect your investment and enjoy stunning, low-maintenance outdoor spaces.
Paver Sealing - How To Seal Pavers

Sealing pavers is an essential step to enhance their appearance, durability, and protection against the elements. Here’s a step-by-step guide to sealing pavers effectively, along with the tools and preparation required.
Step 1: Gather Tools and Materials
Before starting, ensure you have the following items:
Tools and Materials | Purpose |
Pressure washer | Cleaning the surface thoroughly |
Paver sealant | Protecting and enhancing the pavers |
Paint roller or sprayer | Applying the sealant evenly |
Broom and dustpan | Clearing debris and dirt |
Sand (if needed) | Filling gaps between pavers |
Protective gloves and mask | Ensuring safety during the process |
Step 2: Clean the Pavers Thoroughly
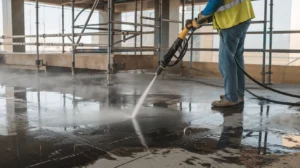
- Use a pressure washer or hose to remove dirt, grime, and algae from the surface.
- Sweep the area with a broom to clear any remaining debris.
- Allowing the pavers to dry completely this step is crucial for proper sealant adhesion.
Step 3: Repair Any Damages
- Inspect the pavers for cracks, chips, or loose pieces.
- Replace damaged pavers and re-level uneven ones.
- Fill gaps between pavers with sand to ensure a smooth, uniform finish.
Step 4: Choose the Right Sealant
- Select a sealant designed for your paver material (brick, concrete, etc.).
- Decide on the finish lossy, matte, or natural based on your aesthetic preferences and protection needs.
Step 5: Apply the Sealant
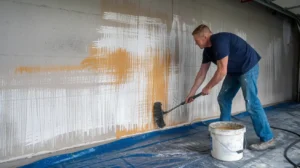
- Using a paint roller or sprayer, apply the sealant evenly across the surface.
- Start from one corner and work systematically to avoid overlapping or missed spots.
- Allow the first coat to dry completely before applying a second coat for enhanced protection.
Step 6: Let It Cure
- Follow the manufacturer’s instructions for curing time.
- Avoid walking or driving on the surface until the sealant is fully set.
Proper preparation and execution are the keys to a successful paver sealing project. With attention to detail, you can achieve a professional-grade finish that protects and beautifies your outdoor spaces.
Should You Seal Your Pavers?
Sealing your pavers is an investment in the longevity and beauty of your outdoor spaces. Whether for a residential driveway or a commercial patio, sealing offers numerous benefits that protect your surfaces while enhancing their appeal. Here’s a closer look at the pros and cons, key factors to consider, and how sealing improves durability and aesthetics.
The Pros of Sealing Pavers
Enhanced Protection:
Paver Sealing creates a barrier against moisture, stains, and UV rays, ensuring your pavers stay vibrant and resistant to damage from the elements.
Improved Appearance:
A quality sealant brings out the natural color and texture of pavers, giving them a polished, professional look that elevates the overall appeal of your property.
Weed and Mold Prevention:
Sealing helps prevent weeds from growing between pavers and inhibits the growth of mold and algae on the surface.
Easier Maintenance:
Sealed pavers are easier to clean and maintain, as the sealant prevents dirt and grime from penetrating the surface.
The Cons of Sealing Pavers
Initial Cost:
Paver Sealing requires an upfront investment, but the long-term benefits far outweigh the costs.
Reapplication Required:
Sealants need to be reapplied every few years to maintain their effectiveness, depending on traffic and environmental conditions.
Proper Timing and Execution:
Sealing requires the right weather and preparation, which may pose challenges if not done correctly.
Factors to Consider Before Sealing
Location and Use:
High-traffic areas like driveways and commercial patios benefit greatly from sealing due to increased wear and tear.
Weather Conditions:
Choose dry, mild weather for sealing to ensure proper adhesion and curing. Humid or rainy conditions can interfere with the process.
Paver Material:
Different materials, such as brick or concrete, may require specific sealants and techniques for optimal results.
How Sealing Enhances Durability and Appearance
- Durability: Paver Sealing strengthens the surface by reducing the impact of weather, heavy loads, and daily use. This minimizes the risk of cracking, fading, and erosion over time.
- Appearance: A sealed surface looks vibrant, clean, and well-maintained. For commercial properties, this boosts curb appeal and leaves a positive impression on clients and visitors.
At Stone Sealer Restoration, we understand the importance of maintaining beautiful and long-lasting pavers. Our sealing services are designed to protect your investment while showcasing the natural elegance of your outdoor spaces. Ready to transform your pavers? Contact us today to learn more!
Brick Paver Sealing: Special Considerations

Brick pavers are a timeless choice for driveways, patios, and walkways, offering classic beauty and durability. However, sealing brick pavers comes with unique challenges and considerations that differ from other types of pavers. By using the right approach and types of sealers, you can effectively protect and enhance the longevity of your brick surfaces.
Unique Characteristics of Brick Pavers
Porous Surface:
Brick pavers are naturally porous, which means they absorb moisture more readily than other materials like concrete. Without proper sealing, this can lead to discoloration, moss growth, and structural weakening over time.
Rustic Appearance:
Brick pavers often feature a textured, uneven surface, adding charm to outdoor spaces. However, their unevenness can trap dirt and debris, making cleaning more challenging if they are not sealed.
Material Fragility:
Although durable, bricks can be more prone to chipping and cracking compared to denser materials. Sealing helps mitigate these vulnerabilities by adding a protective barrier.
Tips for Sealing Brick Pavers
1. Choose the Right Type of Sealer
- Solvent-Based Sealers: These are ideal for brick pavers because they penetrate deeply into the material, providing superior protection against water absorption and stains.
- Film-Forming Sealers: For a glossy, wet-look finish, a film-forming sealer is a great choice, although it may require more maintenance to prevent peeling over time.
2. Prepare Thoroughly Before Sealing
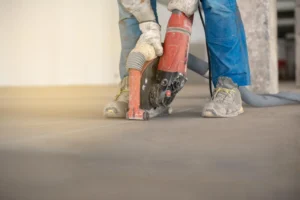
- Clean the Surface: Use a pressure washer to remove dirt, debris, and any existing sealant residues. This ensures that the sealer adheres properly.
- Repair Damages: Inspect for cracks or loose bricks and fix them before applying the sealant. Replace damaged bricks where necessary to maintain a uniform surface.
3. Apply the Sealant Strategically
- Test a Small Area First: Always test your chosen sealer on an inconspicuous section to ensure it delivers the desired finish.
- Apply Evenly: Use a sprayer or roller to coat the pavers evenly. Multiple thin coats are preferable to avoid pooling or streaks.
- Mind the Edges: Pay extra attention to edges and joints, where water can easily seep through and weaken the pavers.
4. Consider the Type of Pavers and Their Use
- For high-traffic areas, use a heavy-duty sealer to withstand wear and tear.
- If the pavers are exposed to harsh weather, prioritize UV-resistant and waterproof sealers.
Why Seal Your Paver Brick Surfaces?
Sealing brick pavers enhances their natural color and protects against damage caused by weather, moisture, and stains. With proper preparation and the right types of sealers, you can extend the life of your brick pavers and maintain their timeless beauty.
Ready to seal your paver surfaces and elevate their durability and appearance? Trust professionals to handle the process with precision for long-lasting results!
What Are the Ideal Weather Conditions for Paver Sealing?
Sealing your pavers under the right weather conditions is essential for achieving a flawless and durable finish. Factors like temperature, humidity, and rainfall play a significant role in the success of the sealing process. Below are guidelines to help you seal your pavers effectively, ensuring long-term protection and appeal.
The Role of Temperature, Humidity, and Rainfall
- Temperature: The ideal range for paver sealing is between 50°F and 90°F. Extreme heat can cause the sealant to dry too quickly, while cold weather can hinder proper curing.
- Humidity: Low to moderate humidity is best for sealing, as high moisture levels in the air can delay drying and curing times.
- Rainfall: Ensure there’s no rain forecast for at least 24 hours after application to allow the sealant to set completely without water interference.
Best Seasons and Times of Day for Sealing
- Spring and Fall: These seasons typically offer mild temperatures and lower humidity, making them ideal for sealing.
- Morning or Late Afternoon: Avoid sealing during peak sunlight hours. Early morning or late afternoon provides optimal conditions to prevent the sealant from drying unevenly.
Avoiding Weather-Related Issues
- Check the weather forecast for at least 48 hours to ensure a rain-free period.
- Avoid sealing on windy days, as dust and debris can settle on the wet sealant.
- For specific surfaces like marble sealing, ensure extra care with temperature and humidity to avoid streaks or discoloration.
By sealing your pavers in optimal weather conditions, you ensure better adhesion, faster curing, and long-term durability. Proper timing is a key step in achieving a professional and polished finish.
How to Seal Concrete Pavers

Paver sealing is essential for maintaining and enhancing the durability of your concrete pavers. With the right techniques and products, you can achieve long-lasting protection and improve the overall appearance of your outdoor space. Here’s how to seal concrete pavers effectively while considering their unique requirements compared to brick pavers.
Specific Techniques and Products for Concrete Pavers
Choose the Right Sealer:
Opt for water-based sealers as they are ideal for concrete pavers, offering strong protection against UV damage, stains, and wear while being environmentally friendly.
Thorough Cleaning:
Clean the surface with a pressure washer to remove dirt, grime, and old sealant residue. Allow the pavers to dry completely before sealing.
Reapply Joint Sand:
Fill gaps between pavers with joint sand to stabilize the surface and prevent weed growth, ensuring a smooth finish for paver sealing.
Apply the Sealant Evenly:
Use a roller or sprayer to apply the sealant in thin, uniform coats, avoiding pooling or streaks.
Differences Between Sealing Concrete and Brick Pavers
Porosity:
Concrete pavers are denser than brick pavers, requiring a sealer that penetrates deeply for effective bonding.
Surface Finish:
The smoother surface of concrete allows for easier and more even application of sealant compared to the textured finish of bricks.
Recommendations for Long-Lasting Results
Perfect Timing: Perform paver sealing in dry, mild weather to ensure proper curing.
Routine Maintenance: Keep the surface clean and reapply water-based sealers every two to three years to maintain protection.
Prevent Wear: Regularly sweep and inspect your pavers to address small issues before they worsen.
By following these steps, you can ensure that your paver sealing project provides excellent protection and keeps your concrete pavers looking beautiful for years to come.
9 Tips for Paver Sealing Success
Achieving a professional finish with paver sealing requires careful preparation and attention to detail. Whether you’re a first-time DIY enthusiast or an experienced professional, these tips will help you seal your pavers effectively while avoiding common pitfalls.
1. Choose the Right Sealer
Select a sealer that suits your paver type. Penetrating sealers are excellent for deep protection, while film-forming sealers create a glossy, protective layer for added visual appeal.
2. Clean the Pavers Thoroughly
Dirt, grime, and stains must be removed before sealing. Use a pressure washer for a deep clean and allow the pavers to dry completely to ensure proper adhesion.
3. Protect Against Staining
Sealing your pavers provides essential protection against staining caused by oil, dirt, and spills. Apply the sealant evenly to prevent any missed spots where stains could seep through.
4. Work in Ideal Weather Conditions
Perform paver sealing during mild, dry weather. Avoid sealing on hot, sunny days as this can cause the sealant to dry unevenly, or on humid days which can delay curing.
5. Apply Thin, Even Coats
For the best results, apply multiple thin coats of sealant instead of one thick layer. This ensures even coverage and reduces the risk of bubbles or peeling.
6. Protect Against UV Rays
Choose a sealer with UV resistance to protect your pavers from fading and discoloration caused by prolonged sun exposure. This is particularly important for outdoor surfaces.
7. Focus on Joint Stability
Reapply sand to the joints before sealing to keep the pavers stable. The sealant will lock the sand in place and create a stronger, cohesive surface.
8. Avoid Overapplication
Using too much sealant can lead to a slippery surface and uneven finish. Follow the manufacturer’s instructions for the right amount to apply.
9. Use High-Quality Products
Investing in high-quality sealers ensures better durability and long-term protection. A premium sealer will provide a reliable protective layer against wear, weather, and stains.
By following these tips, you can master the art of paver sealing and enjoy a flawless finish that enhances both the beauty and durability of your outdoor spaces.
Is Any One Paver Sealing Finish More Protective Than Another?
When it comes to paver sealing, choosing the right finish plays a significant role in both the appearance and protection of your pavers. There are various finishes available, including glossy, matte, and natural looks, each offering different levels of protection. Here’s a breakdown to help you decide the best option for your needs.
Comparison of Finishes: Glossy, Matte, and Natural Look
- Glossy Finish: A glossy finish is ideal if you want to enhance the color of your pavers and give them a vibrant, wet look. While it provides a high level of protection against staining, it may require more maintenance to prevent streaks and dirt buildup.
- Matte Finish: If you prefer a more subtle appearance, a matte finish offers a natural look without the shine. It still provides decent protection but may not be as resistant to stains as glossy finishes.
- Natural Look: The natural finish preserves the original appearance of the pavers, offering a protective layer without altering the color or sheen. It’s the best choice for those who want to maintain a more organic, understated look.
Protective Qualities of Different Sealant Types
- Water-Based Sealers: These sealers are known for their eco-friendliness and ease of application. They provide good protection against stains and UV rays but may need reapplication more frequently than solvent-based sealers.
- Solvent-Based Sealers: Offering a more durable and longer-lasting finish, solvent-based sealers tend to penetrate deeper into the pavers, making them highly resistant to water and stains. These sealers also provide a stronger protective layer against wear and UV rays.
Choosing the Best Finish for Your Needs
When deciding on the best finish for paver sealing, consider how much foot traffic your pavers will experience and the level of maintenance you’re willing to commit to. If your pavers are in a high-traffic area, a glossy finish or solvent-based sealer might be your best option for durability. For surfaces that require easier to clean features, a matte or natural finish could suffice without compromising protection.
For surfaces like granite sealing, a more protective finish is recommended to preserve their integrity under pressure, such as pressure washing and regular wear.
Ultimately, the best finish for your pavers depends on your aesthetic preferences and functional needs. By selecting the right paver sealing finish, you can enjoy a long-lasting, well-protected surface that enhances your outdoor space.
Understanding Paver Sealing Cost

Paver sealing is an investment in the long-term beauty and durability of your outdoor spaces. The cost of sealing your pavers can vary depending on whether you choose a DIY approach or hire a professional. In this guide, we’ll break down the costs involved and provide tips on how to save money while ensuring a high-quality finish.
DIY vs. Professional Sealing
Choosing between a DIY project and hiring a professional for paver sealing depends on your budget, expertise, and the complexity of the job. Below is a comparison of the typical costs for each option:
Sealing Method | Cost Range | Advantages | Considerations |
DIY Sealing | $0.50 – $2 per sq. ft. | Lower cost, complete control | Requires time, effort, and equipment |
Professional Sealing | $1.50 – $4 per sq. ft. | High-quality finish, faster, long-lasting | Higher upfront cost, but more efficient |
Factors Influencing the Cost
- Size of the Area:
Larger areas require more time, materials, and labor, thus increasing the overall cost. For extensive paver sealing projects, professional services may be more cost-effective. - Material of Pavers:
Different paver materials, such as concrete, brick, or stone, may require specific sealers. Some materials, like granite or brick, might need more specialized care, which can impact the cost. - Condition of Pavers:
If your pavers are old, damaged, or have accumulated grime, additional prep work such as cleaning, repairing cracks, or reapplying joint sand may be necessary, which can add to the cost. - Type of Sealer:
The type of sealer you choose water-based, solvent-based, or premium sealants can affect both material and application costs. Higher-end sealers offer better protection but may come with a steeper price tag.
Tips to Save Money Without Compromising Quality
- DIY for Smaller Areas:
If you have a small driveway or patio, taking the DIY route can be an excellent way to save money on paver sealing. Just be sure to research the best methods and tools. - Time Your Project:
Schedule your sealing project during the off-season or when there’s a lull in demand to potentially get better rates from professional sealers. - Routine Maintenance:
Regular cleaning and basic maintenance can extend the life of your sealer and prevent the need for frequent reapplications, saving you money in the long term. - Get Multiple Quotes:
If you’re opting for professional services, always get several quotes to compare prices and ensure you’re getting the best deal without compromising quality.
At Stone Sealer Restoration, we offer high-quality paver sealing services that ensure your pavers are protected for the long haul. Whether you choose to go the DIY route or work with professionals, we’re here to provide expert advice and affordable, reliable solutions tailored to your needs. Contact us today for a free consultation!
Final Thoughts
Paver sealing is an essential step in enhancing the durability, appearance, and long-term protection of your outdoor spaces. By sealing your pavers, you can prevent stains, damage from UV rays, and wear from weather, ensuring your pavers look beautiful and last longer. Whether you choose to tackle the project yourself or hire a professional, the benefits are undeniable.
For long-term protection and a flawless finish, contact Stone Sealer Restoration today! Our team of experts will guide you through the process, offering high-quality services that save you time and money. Don’t wait to seal your pavers and preserve your outdoor investment now!


