

Concrete floors often crack, sink, and crumble over time. What...
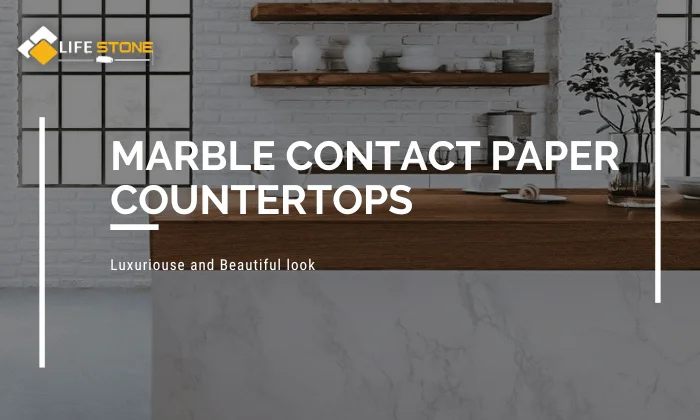
Read MoreHow to Elevate Kitchen With Marble Contact Paper Countertops
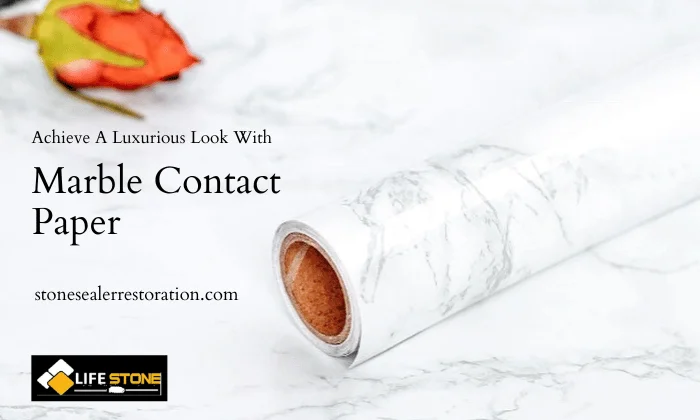
Marble contact paper is an affordable and versatile solution for achieving a luxurious aesthetic in your home. Whether you want a classic white marble look or something more unique like epoxy marble floor, black, blue, or pink marble patterns, this self-adhesive paper can completely transform the appearance of your countertops.
In today’s interior design world, achieving a luxurious and stylish look doesn’t always require a hefty budget or a complete renovation. One of the hottest trends in home decor right now is the use of marble contact paper to transform countertops. With the right techniques and a touch of creativity, you can give your kitchen or bathroom a high-end makeover that will leave your guests in awe.
If you want to learn more about how to achieve this stunning transformation, read more.
Choosing the Right Marble Contact Paper
When embarking on a project to transform your countertops with marble contact paper, one of the crucial decisions you’ll need to make is choosing the right type of contact paper.
The perfect choice will ensure that your countertops not only look stunning but also withstand the test of time. Here are some essential considerations to help you make the best selection:
Color and Pattern:
Start by considering the color and pattern of the marble contact paper. Do you want a classic white marble appearance, or are you looking for something more unique like black, blue, or pink marble patterns? Your choice should harmonize with your existing decor and personal style.
Thickness and Durability:
Marble contact paper comes in varying thicknesses, and this can affect its durability. Thicker papers tend to be more robust and resistant to daily wear and tear. If your countertops receive heavy use, opting for a thicker paper is advisable.
Self-Adhesive Quality:
Check whether the contact paper is self-adhesive. Most marble contact papers are, but it’s always good to verify. Self-adhesive paper makes installation much more straightforward and eliminates the need for messy glues.
Size and Coverage:
Measure your countertops carefully and choose a roll of contact paper that provides adequate coverage. It’s better to have a little extra paper than to run out mid-project. Remember to factor in any overhang you may want for a seamless finish.
Texture and Finish:
Some marble contact papers have a glossy finish, while others have a matte texture. The choice between the two comes down to personal preference and the overall aesthetic you want to achieve. Glossy finishes can give a more polished look, while matte finishes offer a softer appearance.
Brand Reputation:
Consider the reputation of the brand. Opt for well-known and reputable manufacturers or suppliers to ensure that you receive a high-quality product. Reading customer reviews can also provide valuable insights into the quality of the contact paper.
Ease of Removal:
While you may be excited about your new marble countertops, it’s essential to think about the future. Choose a marble contact paper that can be removed without causing damage to the underlying surface. Look for papers that are easy to peel off when you’re ready for a change.
Budget:
Last but not least, consider your budget. Marble contact paper is generally an affordable option compared to real marble countertops. Prices can vary, so shop around to find a product that fits your budget without compromising quality.
Preparing Your Countertops
Before you embark on the exciting journey of transforming your countertops with marble contact paper, it’s crucial to ensure that your existing surface is properly prepared.
Adequate preparation, including marble cleaning and polishing, will not only make the installation process smoother but also contribute to the longevity and overall success of your project. Here’s a step-by-step guide on how to prepare your countertops:
Clear the Countertops:
Start by removing all items from your countertops, including appliances, utensils, and decorative items. Clearing the space allows you to work more efficiently and prevents any obstruction during the installation process.
Clean Thoroughly:
Next, give your countertops a thorough cleaning. Use a mild detergent or a specialized countertop cleaner to remove any dirt, grease, or residue. Pay close attention to areas around the sink and stove, as these tend to accumulate the most grime.
Rinse and Dry:
After cleaning, rinse the countertops with clean water to remove any remaining cleaning product. Ensure that the surface is entirely free of soap or detergent. Once rinsed, use a clean, dry cloth or paper towels to thoroughly dry the countertops.
Remove Old Adhesives or Residue:
Check for any old adhesives, stickers, or residue left behind from previous countertop treatments. Use a gentle adhesive remover or rubbing alcohol to soften and remove any stubborn residues. Make sure the surface is entirely smooth and clean before proceeding.
Repair Imperfections:
Inspect the countertops for any imperfections, such as cracks, chips, or uneven surfaces. Depending on the severity of the imperfections, you may need to consider repairs. Minor imperfections can often be filled with epoxy or filler products designed for countertops. Larger issues may require professional attention.
Sand the Surface (Optional):
If your countertops have a glossy finish or an extremely smooth surface, consider lightly sanding them with fine-grit sandpaper. This will create a slightly rougher texture that can help the contact paper adhere better. Be sure to clean off any sanding dust before proceeding.
Prime the Surface (Optional):
Some experts recommend applying a primer to the countertops, especially if you have sanded the surface. A primer can enhance the adhesion of the marble contact paper. Be sure to choose a primer suitable for your countertop material and follow the manufacturer’s instructions.
Measure and Plan:
Before you start applying the marble contact paper, measure your countertops carefully and plan how you will lay out the paper. Consider any seams or corners that may require special attention during installation.
Ensure a Dust-Free Environment:
Lastly, create a dust-free environment in your workspace. Dust particles can become trapped under the contact paper, leading to imperfections in the final result. Wipe down the countertops once more to remove any dust or debris.
By following these steps to prepare your countertops, you’ll set the stage for a successful marble contact paper installation. Adequate preparation ensures that the paper adheres smoothly and securely, creating a stunning and long-lasting transformation for your kitchen or bathroom.

Measuring and Cutting
Once you’ve prepared your countertops and selected the perfect marble contact paper, the next crucial steps in your countertop transformation project involve accurate measuring and precise cutting.
These steps are essential to ensure that the contact paper fits perfectly and creates a seamless and polished look. Here’s a detailed guide on how to measure and cut your marble contact paper:
Measure Your Countertops:
Begin by measuring your countertops carefully. Use a measuring tape to determine the length and width of each section of your countertop. Ensure your measurements are accurate and account for any overhang you want for a seamless finish.
Create a Template (Optional):
If your countertops have complex shapes or angles, it may be helpful to create a template using butcher paper or cardboard. Lay the template over your countertop, trace the shape, and cut it out. This template can serve as a guide when cutting the contact paper.
Lay Out the Contact Paper:
Unroll the marble contact paper on a clean, flat surface, such as a large table or the floor. Ensure the adhesive side is facing up, and carefully align it with your measurements. Use a ruler or a straightedge to mark the dimensions you measured on the back of the contact paper. This will serve as your cutting guide.
Cut Along the Marked Lines:
With your measurements marked on the contact paper, use sharp scissors or a utility knife to cut along the marked lines. For straight cuts, a utility knife and a straightedge work best, while scissors are ideal for curves and corners.
Trim as Needed:
Pay special attention to corners and edges, trimming the contact paper carefully to ensure a precise fit. Be patient and take your time, as precise trimming is key to achieving a professional-looking result.
Test the Fit:
After cutting, place the contact paper pieces on your countertops to ensure they fit accurately. Make any necessary adjustments by trimming or reshaping the paper until it aligns perfectly with your countertop’s edges and corners.
Consider Seams:
If your countertops are larger than a single sheet of contact paper, you may need to create seams. When aligning the seams, be sure they are as inconspicuous as possible. Overlapping the sheets slightly can help create a seamless look.
Remove the Backing:
Once you are satisfied with the fit and placement of the contact paper, peel off a small section of the backing paper, exposing the adhesive side. Start at one end and gradually peel away the backing while pressing the contact paper onto the countertop’s surface.
Smooth Out Air Bubbles and Wrinkles:
Use a squeegee or a credit card wrapped in a soft cloth to smooth out any air bubbles or wrinkles as you apply the contact paper. Start from the center and work your way towards the edges to ensure a smooth, bubble-free finish.
Trim Excess Paper:
After adhering the contact paper, carefully trim any excess paper using a sharp utility knife or scissors. Pay close attention to corners and edges for a seamless appearance.
Continue with the Remaining Sections:
Repeat the measuring, cutting, and application process for each section of your countertops until the entire surface is covered with the marble contact paper.
By following these steps, you’ll be able to measure and cut your marble contact paper accurately, ensuring a flawless and professional-looking finish.
Take your time during this phase to achieve the best results, and enjoy the transformation of your countertops into stunning marble masterpieces.
Applying the Marble Contact Paper
Once you’ve successfully applied the marble contact paper to your countertops, the next crucial step is to ensure that the surface is smooth, free of any air bubbles, and devoid of wrinkles. Achieving a flawless finish is essential for a polished and professional look. Here’s how to smooth out bubbles and wrinkles:
Gather Your Tools:
Before you begin, gather the necessary tools. You’ll need a squeegee, a credit card wrapped in a soft cloth, and a utility knife or scissors for any necessary trimming.
Start from the Center:
Begin smoothing out the contact paper from the center of the applied section. This helps push any trapped air towards the edges, making it easier to eliminate bubbles and wrinkles.
Apply Even Pressure:
Hold the squeegee or the cloth-covered credit card firmly in your hand and apply even pressure as you work your way outward from the center. Use long, even strokes to press the contact paper against the countertop.
Work in Sections:
If you have a large countertop or if you’re covering multiple sections with contact paper, work in manageable sections. Smooth out one section at a time to ensure thorough attention to detail.
Pay Attention to Edges and Corners:
Focus on edges, corners, and seams as they are common areas where bubbles and wrinkles may form. Use your fingers or the edge of the squeegee to gently press the contact paper into these areas, working out any imperfections.
Address Stubborn Bubbles:
For stubborn bubbles that resist initial smoothing, use a pin or a needle to make a tiny puncture at the center of the bubble. Then, use the squeegee or cloth-covered credit card to press out the air towards the puncture hole. Be gentle to avoid damaging the paper.
Stretch Out Wrinkles:
If you encounter wrinkles, carefully lift the contact paper in the affected area and gently stretch it out while smoothing it back down. Work slowly to avoid creating new wrinkles.
Trim Excess Paper:
As you smooth out bubbles and wrinkles, you may notice that some areas of the contact paper overlap or have excess material. Trim these areas using a utility knife or scissors for a neat and seamless finish.
Repeat as Needed:
Continue this process, section by section, until you’ve smoothed out all the bubbles and wrinkles on your entire countertop surface.
Inspect and Final Adjustments:
Once you’ve completed the smoothing process, carefully inspect the entire countertop. Look for any remaining imperfections and make final adjustments as needed. Pay attention to seams and edges to ensure they are well-blended.
By following these steps, you can ensure that your marble contact paper adheres smoothly and flawlessly to your countertops. A well-executed smoothing process will result in a beautiful, high-end look that will impress anyone who sees your newly transformed space.
Smoothing Out Bubbles and Wrinkles
Ensuring a flawless finish when applying marble contact paper to your countertops is essential for achieving a professional and elegant look. Bubbles and wrinkles can detract from the overall aesthetic.
So it’s crucial to know how to smooth them out effectively. Here’s a step-by-step guide on how to tackle bubbles and wrinkles during the installation process:
Gather Your Tools:
Before you begin, gather the necessary tools. You will need a squeegee, a credit card wrapped in a soft cloth, and a utility knife or scissors for any trimming.
Start from the Center:
Begin smoothing out the contact paper from the center of the applied section. This technique helps to push any trapped air or wrinkles towards the edges, making them easier to eliminate.
Apply Even Pressure:
Hold the squeegee or the cloth-covered credit card firmly, and apply even pressure as you work your way outward from the center. Use long, steady strokes to press the contact paper against the countertop.
Work in Sections:
If you’re covering a large countertop or applying contact paper to multiple sections, tackle one section at a time. This approach allows you to focus on each area thoroughly.
Concentrate on Edges and Corners:
Pay special attention to edges, corners, and seams, as these are common trouble spots for bubbles and wrinkles. Gently use your fingers or the edge of the squeegee to press the contact paper into these areas, working out any imperfections.
Address Stubborn Bubbles:
For stubborn bubbles that resist initial smoothing, use a pin or a needle to make a tiny puncture at the center of the bubble. Then, use the squeegee or cloth-covered credit card to press out the air towards the puncture hole. Be cautious not to damage the paper.
Smooth Out Wrinkles:
If you encounter wrinkles, carefully lift the contact paper in the affected area and gently stretch it out while smoothing it back down. Proceed slowly to avoid creating new wrinkles.
Trim Excess Paper:
While smoothing, you may find areas where the contact paper overlaps or has excess material. Trim these areas with a utility knife or scissors to maintain a neat and seamless appearance.
Repeat as Needed:
Continue this process, section by section, until you’ve smoothed out all bubbles and wrinkles across the entire countertop surface.
Final Inspection and Adjustments:
After smoothing, conduct a thorough inspection of the entire countertop. Look for any remaining imperfections and make any necessary final adjustments. Ensure that seams and edges are well-blended and free of defects.
By following these steps and taking your time during the smoothing process, you can achieve a flawless finish when applying marble contact paper to your countertops. A well-executed smoothing process will result in a stunning transformation that enhances the elegance and style of your space.
Trimming Excess Paper
Once you’ve successfully applied marble contact paper to your bullnose edge countertops and smoothed out any bubbles or wrinkles, the final step in achieving a polished and professional look is trimming any excess paper.
Trimming ensures that the contact paper fits precisely and seamlessly along the edges and corners of your countertops. Here’s a step-by-step guide on how to trim excess paper:
Gather Your Tools:
Before you begin, gather the necessary tools. You’ll need a sharp utility knife or a pair of scissors and a straightedge or ruler for straight cuts.
Examine the Edges:
Carefully inspect the edges of your countertops where the contact paper overlaps. Look for areas where the paper extends beyond the countertop’s edge.
Align the Straightedge:
For straight cuts along the edges, align a straightedge or ruler along the countertop’s edge where the excess contact paper needs trimming. Ensure that the straightedge is securely in place and that it follows the desired cutting line.
Trim Along the Edge:
If using a utility knife, carefully run the blade along the straightedge, applying gentle pressure. Make slow and controlled cuts to avoid any jagged edges or mishaps. For curved or irregular edges, use scissors for precision.
Repeat for Corners:
Pay special attention to corners and angles. Trim the excess contact paper at corners by carefully cutting at a 45-degree angle to create neat and clean corners.
Trim Seam Overlaps:
If you have seams where two pieces of contact paper meet, ensure they are aligned perfectly. Trim any overlap carefully to create an inconspicuous seam. Use a sharp knife or scissors for this purpose.
Check for Overhangs:
Inspect all sides of your countertop to make sure there are no overhangs or loose edges of contact paper. If you find any, trim them neatly to create a uniform and seamless appearance.
Take Your Time:
Be patient and take your time when trimming excess paper. Rushing this step can lead to uneven cuts or accidental damage to the contact paper.
Final Inspection:
After trimming, conduct a final inspection of your countertops. Examine the edges, corners, and seams to ensure they are clean, smooth, and well-finished.
Dispose of Excess Material:
Safely dispose of the excess contact paper material. Be sure to clean up any scraps to leave your workspace tidy.
Trimming excess paper is the final touch in the process of applying marble contact paper to your countertops. It ensures a precise fit and a seamless finish, allowing your countertops to showcase their newfound elegance and style.
Adding a Protective Sealant
Once you’ve successfully applied marble contact paper to your countertops and ensured a smooth, wrinkle-free surface, the next essential step is to apply a protective sealant.
A sealant not only enhances the durability of your contact paper but also safeguards it from moisture, stains, and daily wear and tear. Here’s a step-by-step guide on how to add a protective sealant to your marble contact paper countertops:
Choose the Right Sealant:
Select a sealant that is suitable for use on your specific type of contact paper and countertop material. Most sealants designed for countertops, such as clear acrylic or polyurethane, work well with marble contact paper. Ensure that the sealant is water-based and safe for indoor use.
Gather Your Tools and Materials:
Before you begin, gather the necessary tools and materials:
- Protective gloves
- Safety goggles (if required by the sealant manufacturer)
- A high-quality paintbrush or foam brush
- A paint tray or disposable container
- Lint-free cloths or rags
- Painter’s tape (optional) to protect adjacent surfaces
Prepare Your Workspace:
Lay down drop cloths or newspaper to protect your surrounding area from any potential drips or spills. Adequate ventilation in the workspace is essential, so consider opening windows or using fans if you are working indoors.
Clean the Countertops:
Ensure that your countertops are clean and free from dust or debris. Wipe them down with a damp cloth and allow them to dry completely before applying the sealant.
Wear Protective Gear:
Put on protective gloves and safety goggles if required by the sealant manufacturer. Safety should always be a priority when working with chemicals.
Apply the Sealant:
Pour the sealant into a paint tray or a disposable container. Dip your paintbrush or foam brush into the sealant, and begin applying it evenly to the surface of the contact paper. Start at one end and work your way to the other in long, smooth strokes.
Work in Thin Layers:
It’s essential to apply the sealant in thin, even layers. Avoid applying it too thickly, as this can result in a cloudy or uneven finish. Multiple thin coats are more effective than one thick coat.
Pay Attention to Edges and Seams:
Be especially careful when applying sealant to edges, corners, and seams. These areas are more vulnerable to moisture and should receive extra attention to ensure proper protection.
Allow for Drying Time:
Follow the manufacturer’s instructions regarding drying time. Typically, you’ll need to wait for the first coat to dry completely before applying additional coats. This may take several hours, so plan accordingly.
Apply Multiple Coats (if necessary):
Depending on the sealant you’ve chosen, you may need to apply multiple coats for optimal protection. Sand lightly between coats if the manufacturer recommends it.
Remove Painter’s Tape (if used):
If you used painter’s tape to protect adjacent surfaces, remove it carefully while the sealant is still slightly tacky to avoid peeling.
Allow for Full Cure Time:
After applying the final coat, allow the sealant to cure fully. This may take several days, so refrain from using the countertops during this time to ensure the best results.
Maintenance and Cleaning
After successfully applying marble contact paper to your countertops and adding a protective sealant, it’s important to establish a regular maintenance routine to keep your surfaces looking pristine.
Proper care will help extend the lifespan of your countertop transformation and ensure it continues to enhance the aesthetics of your space. Here’s a guide on maintenance and cleaning for marble contact paper countertops, including how to clean marble:
Daily Cleaning:
Wipe down your countertops daily with a clean, damp cloth or sponge to remove crumbs, spills, and surface dust. This simple routine helps prevent debris from accumulating and becoming more challenging to clean later.
Mild Detergent and Water:
For more substantial cleaning, mix a few drops of mild dish detergent with warm water. Use this solution to clean the surface thoroughly, then rinse with clean water and wipe dry. Avoid harsh or abrasive cleaners, as they can damage the contact paper.
Avoid Excessive Moisture:
While marble contact paper is water-resistant, excessive moisture can still be problematic over time. Wipe up spills promptly to prevent any potential damage or staining. Pay extra attention to seams and edges, as moisture can penetrate these areas more easily.
Use Cutting Boards and Trivets:
Protect your countertops from scratches and heat damage by using cutting boards for meal preparation and trivets or hot pads under hot cookware or appliances. This will help maintain the integrity of the contact paper.
Gentle Scrubbing:
For stubborn stains or residue, use a soft cloth or sponge to gently scrub the affected area with the mild detergent and water solution. Avoid abrasive scrubbers or scouring pads, as they can scratch the surface.
Avoid Sharp Objects:
Prevent damage by avoiding cutting directly on the contact paper with sharp knives or utensils. Always use a cutting board to protect the surface.
Reapply Sealant (if necessary):
Over time, the protective sealant may wear off or become less effective. If you notice that water no longer beads up on the surface, it may be time to reapply a fresh coat of sealant to maintain optimal protection.
Routine Inspection:
Periodically inspect your countertops for any signs of damage or wear. Address any issues promptly to prevent further deterioration.
Gentle Touch:
Handle your countertop surfaces with care. Avoid dragging heavy objects across them or using excessive force that could cause peeling or damage to the contact paper.
Avoid Harsh Chemicals:
Stay away from harsh chemicals, abrasive cleaners, and products containing bleach or ammonia, as they can harm the contact paper’s appearance and adhesion.
Regular Reapplication:
Depending on the quality of the contact paper and the level of daily use, you may need to consider reapplying or replacing the contact paper every few years to maintain a fresh and flawless look.
The Versatility of Black Marble Contact Paper
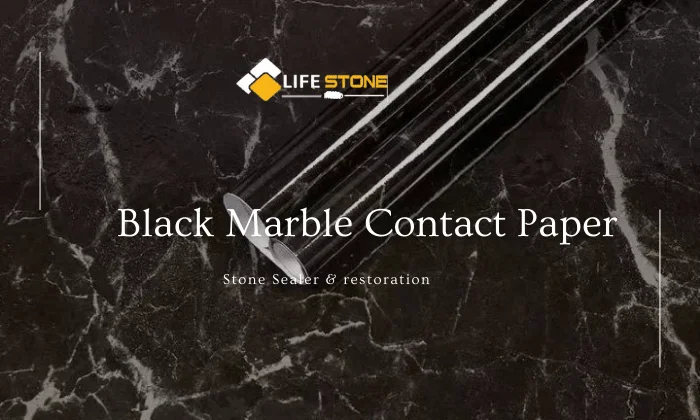
Black marble contact paper is a design enthusiast’s secret weapon when it comes to transforming spaces with a touch of elegance and sophistication.
Black & white marble tile’s versatility makes it a popular choice for various home improvement projects, allowing homeowners to achieve a luxurious look without the hefty price tag of real black marble.
1. Kitchen Countertops:
One of the most common uses of black marble contact paper is to revamp kitchen countertops. It instantly lends a sleek, modern, and high-end appearance to your culinary space. Whether you have a contemporary kitchen or a traditional one, black marble contact paper can complement a wide range of design styles.
2. Bathroom Vanities:
Bathrooms benefit greatly from the dramatic flair of black marble contact paper. Applying it to bathroom vanities can create a spa-like atmosphere and make a bold design statement. Pair it with chrome or gold fixtures for added sophistication.
3. Furniture Makeovers:
Black marble contact paper can be used to upgrade the look of various furniture pieces. It’s perfect for accent tables, dressers, or even the top of a console table. The contrast of the dark marble against other materials like wood or metal creates a visually striking effect.
4. Backsplashes:
As a backsplash material, black marble contact paper adds depth and character to your kitchen or bathroom. It’s an excellent choice if you want to create a focal point or make a bold statement in these spaces.
5. Shelving and Bookcases:
Transform ordinary shelving or bookcases into stylish pieces by lining the shelves with black marble contact paper. This not only adds an element of luxury but also makes your decor items pop against the dark backdrop.
6. Accent Walls:
For those who crave a dramatic change, consider using black marble contact paper to create an accent wall. Whether in the living room, bedroom, or even a home office, it can instantly elevate the ambiance of the room.
7. DIY Projects:
Crafters and DIY enthusiasts can get creative with black marble contact paper. It can be used for crafting custom wall art, lining drawers and cabinets, or decorating accessories like trays and vases.
8. Rental-Friendly Decor:
If you’re renting your space and unable to make permanent changes, black marble contact paper offers a temporary solution. You can apply it to countertops, cabinets, or any other surface and remove it easily when it’s time to move.
9. High-Impact Low-Cost Design:
Black marble contact paper provides a high-impact design element at a fraction of the cost of real marble. It allows homeowners to achieve a luxe look without breaking the bank.
10. Easy Installation and Maintenance:
Another advantage of black marble contact paper is its ease of installation and maintenance. Unlike real marble, it doesn’t require sealing or special cleaning agents. Regular cleaning with a mild detergent and water is usually sufficient.
Timeless Elegance with White Marble Contact Paper
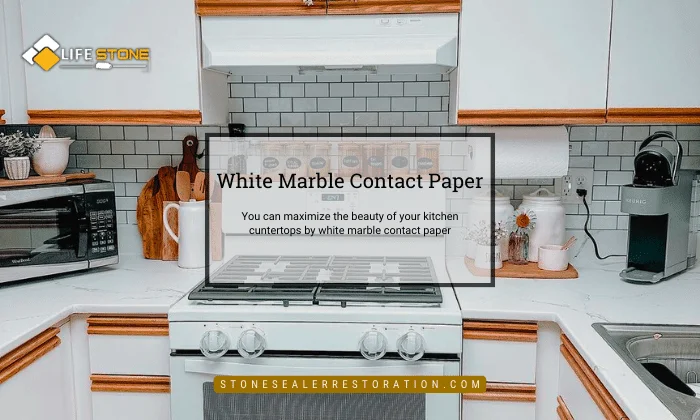
When it comes to achieving a timeless and elegant aesthetic in your home, few design elements can rival the versatility and sophistication of white marble contact paper.
This versatile material allows you to bring the classic beauty of white marble into your living space without the high cost and maintenance associated with real marble.
Kitchen Countertops:
White marble contact paper can transform your kitchen countertops into a stunning focal point. Its clean and bright appearance pairs well with both traditional and contemporary kitchen designs. The subtle veining patterns of white marble contact paper add depth and character to your cooking space.
Dining Tables:
Covering your dining table with white marble contact paper instantly elevates your dining area. It creates a luxurious backdrop for your meals, making everyday dining feel like a special occasion.
Bathroom Vanities:
White marble contact paper is an excellent choice for bathroom vanities. It provides a crisp, clean look that’s perfect for a spa-like atmosphere. Pair it with chrome or brushed nickel fixtures for a timeless and elegant bathroom design.
Backsplashes:
Whether in the kitchen or bathroom, white marble contact paper can be used to create stunning backsplashes. It brightens up the space, reflects light, and complements a wide range of color schemes.
Furniture Refinishing:
Revive old or worn-out furniture by applying white marble contact paper. Dressers, side tables, and coffee tables can all benefit from the elegant makeover that this material provides.
Decorative Accents:
Use white marble contact paper for DIY projects and decorative accents. It’s perfect for lining the back of bookshelves, creating custom wall art, or covering accessories like trays and vases.
Wall Panels:
For a truly opulent look, consider using white marble contact paper to create wall panels or wainscoting in your living room or dining area. This adds depth and texture to the space and exudes a sense of grandeur.
Minimalist Elegance:
White marble contact paper complements minimalist design styles exceptionally well. Its simplicity and purity of color contribute to a clean and uncluttered look that feels both modern and timeless.
Rental-Friendly Decor:
If you’re renting your home, white marble contact paper provides a temporary yet elegant design solution. You can easily apply it to various surfaces and remove it when you move out.
Easy Maintenance:
White marble contact paper is easy to clean and maintain. Regular wiping with a damp cloth or mild detergent is usually sufficient to keep it looking pristine.
Adding a Pop of Color with Blue Marble Contact Paper
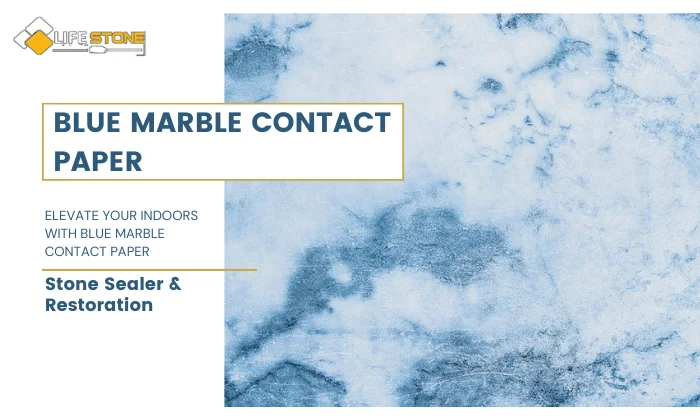
Blue marble contact paper is a unique and captivating design element that can breathe new life into your living spaces. Its distinctive combination of rich blue hues and marble-like patterns adds a touch of luxury and serenity to any room.
Kitchen Backsplash:
Incorporating blue marble contact paper as a kitchen backsplash can instantly elevate the heart of your home. The deep blue tones evoke a sense of calmness and can be paired with white or light-colored cabinetry for a striking contrast.
Bathroom Walls:
Applying blue marble contact paper to bathroom walls can create a serene and spa-like ambiance. It complements white fixtures and provides a sense of tranquility that’s perfect for unwinding in the bath or shower. However, it’s essential to know how to clean marble shower surfaces to maintain their beauty and durability.
Accent Furniture:
Transforming furniture pieces with blue marble contact paper can make a bold design statement. Coffee tables, side tables, or shelving units can all benefit from the infusion of color and elegance that this material offers.
Cabinets and Countertops:
If you’re looking to refresh your kitchen or bathroom on a budget, consider covering cabinet doors and countertops with blue marble contact paper. It’s a cost-effective alternative to a full renovation and can provide a refreshing change.
Artistic Wall Panels:
Create an artistic focal point in your living room or dining area by using blue marble contact paper to craft wall panels. The striking patterns and hues draw the eye and add depth to your space.
Custom Wall Art:
Craft DIY wall art using blue marble contact paper. Whether you’re creating framed art pieces or intricate designs on canvas, the material’s unique appearance adds an element of sophistication to your decor.
Entryway Statements:
Make a lasting first impression by incorporating blue marble contact paper into your entryway decor. Covering a console table or creating an accent wall can set the tone for the rest of your home.
Nautical or Coastal Themes:
Blue marble contact paper complements nautical or coastal design themes exceptionally well. Its deep blue tones resonate with the ocean, making it an ideal choice for homes near the water.
Vintage and Eclectic Spaces:
For vintage or eclectic interiors, blue marble contact paper can act as a unique twist. It adds a contemporary touch while retaining a sense of timelessness.
Easy Application and Removal:
One of the advantages of blue marble contact paper is its ease of application and removal. If you decide to change your decor in the future, it can be peeled off without leaving a residue, making it a versatile and non-permanent design solution.
Maintenance Made Simple:
Blue marble contact paper is easy to clean and maintain. Regular wiping with a damp cloth or mild detergent can keep it looking fresh and elegant.
Feminine Charm with Pink Marble Contact Paper
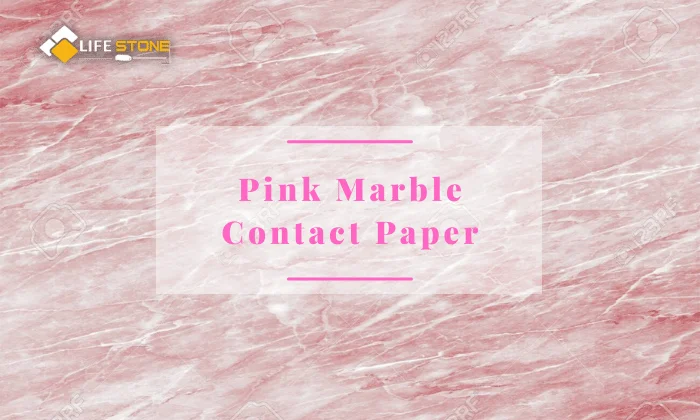
Pink marble contact paper is a delightful and charming design element that can breathe new life into your living spaces with a touch of elegance and femininity. Its soft and soothing pink hues, combined with the intricate marble patterns, create a sense of sophistication and serenity.
Feminine Elegance:
Pink marble contact paper is an excellent choice for infusing a touch of feminine elegance into your home. Its delicate pink tones evoke feelings of grace and refinement.
Bathroom Vanity Makeover:
Applying pink marble contact paper to your marble tile bathroom vanity can instantly refresh the space. It creates a harmonious and tranquil atmosphere, making it an ideal choice for your morning routine.
Kitchen Backsplash:
Consider using pink marble contact paper as a kitchen marble tile backsplash to add a subtle hint of color and charm. It pairs beautifully with white or light-colored cabinets, creating a balanced and inviting culinary space.
Chic Furniture Accent:
Revamp furniture pieces like accent tables, nightstands, or dressers with pink marble contact paper. It can give your furniture a chic and stylish makeover while maintaining a timeless appeal.
Creative Wall Art:
Unleash your creativity by crafting wall art using pink marble contact paper. Whether you create framed artwork or intricate patterns on canvas, the soft pink hues can add a unique and artistic touch to your decor.
Entryway Glamour:
Make a lasting impression in your entryway by incorporating pink marble contact paper into your decor. It can be applied to console tables or accent walls, creating an elegant and welcoming ambiance.
Cozy Reading Nooks:
Transform your reading nook or home library with the soothing presence of pink marble contact paper. It adds a touch of luxury and serenity, making it the perfect space to unwind with a book.
Romantic Bedroom:
Enhance the romantic atmosphere of your bedroom by introducing pink marble contact paper as an accent wall or as part of your headboard design. The soft pink tones create an intimate and inviting ambiance.
Vintage and Shabby Chic Styles:
Pink marble contact paper can effortlessly blend with vintage or shabby chic interior styles. It adds a contemporary twist while maintaining the timeless charm of these design aesthetics.
Budget-Friendly Transformation:
If you’re looking to update your home decor on a budget, pink marble contact paper offers an affordable and impactful solution. It can give your space a fresh and stylish look without breaking the bank.
Easy Application and Maintenance:
Pink marble contact paper is known for its easy application and removal. Should you decide to change your decor in the future, it can be peeled off without leaving a residue, making it a versatile and non-permanent design choice.
Simple Maintenance:
Keeping your pink marble contact paper looking fresh is easy. Regular cleaning with a damp cloth or mild detergent can maintain its elegant appearance.
Brand Spotlight: Stone Sealer & Restoration
When it comes to maintaining the beauty of your marble contact paper countertops, trust Stone Sealer & Restoration. Their range of sealing like paver sealing and stone restoration services will keep your surfaces looking brand new.
Conclusion
Achieving a luxurious look with marble contact paper countertops is not only cost-effective but also allows for endless creativity. Whether you prefer classic white, bold black, or colorful options like blue and pink marble contact paper, the key is in the details. With the right techniques and some patience, you can elevate the aesthetics of your home.
Now, it’s time to get creative and transform your countertops into stunning pieces of art. Experiment with different styles, and don’t be afraid to let your personality shine through your interior design choices. If you need any assistance or have questions about our countertop options, feel free to contact us for more information.
FAQs
Is Marble Contact Paper Durable?
Yes, marble contact paper is durable and can withstand daily use. However, using a protective sealant is recommended for longevity.
Can I Remove Marble Contact Paper Without Damaging The Surface Underneath?
Yes, marble contact paper can be removed without damaging the surface underneath, but it’s essential to follow the removal instructions carefully.
Can I Use Marble Contact Paper On Bathroom Countertops?
Yes, marble contact paper is suitable for bathroom countertops and can add a touch of luxury to your space.
What Other Applications Can Marble Contact Paper Have Besides Countertops?
Marble contact paper can be used for various DIY projects, such as furniture refurbishment, decorative accents, and even wall coverings.
Where Can I Purchase High-Quality Marble Contact Paper?
You can find high-quality marble contact paper from reputable home improvement stores, online retailers, or specialty craft shops.
Our Services
Our Recent Post
What Does Etching On Marble Look Like
Marble may look strong and timeless, yet its appearance can...
Read More
How to Clean Concrete Floor | A Step-by-Step Guide for Sparkling Results
How to Clean Concrete Floor effectively is essential to maintaining...
Read More
How to Remove Paint from Concrete
How to Remove Paint from Concrete? Cleaning away paint layers...
Read More