Concrete floors often crack, sink, and crumble over time. What begins as a hairline fracture...
How to Seal Marble Tile for Long-Lasting Beauty
Marble tile flooring and countertops bring timeless elegance to any space, but maintaining their lustrous beauty requires proper care and protection. One of the most critical maintenance tasks homeowners face is learning how to seal marble tile effectively.
In this comprehensive guide, we’ll delve into the art of sealing marble tiles, specifically tailored for homeowners looking to enhance their space or professionals in the Stone Sealer Restoration business. Applying the right marble tile sealer not only safeguards your investment but also ensures your marble retains its sophisticated appeal for years to come.
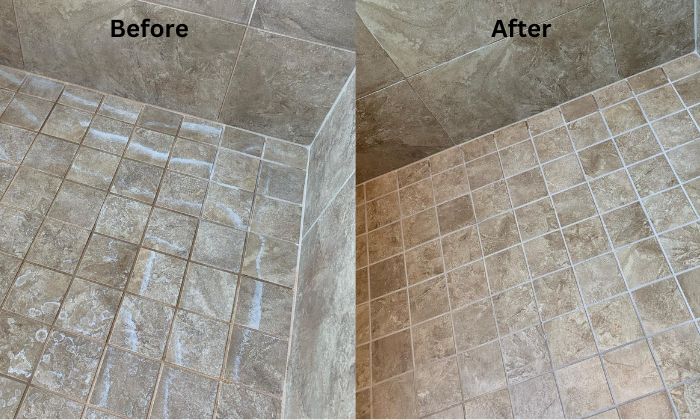
Why Seal Marble Tiles?
Sealing marble tiles serves several purposes:
Stain Prevention
Sealing plays a crucial role in maintaining the pristine appearance of marble and facilitating the removal of stains. By creating a protective barrier, such as how to seal marble tile effectively, repels liquids and prevents them from penetrating the marble surface.
This barrier not only safeguards the marble from potential damage caused by spills but also makes the process of marble stain removal significantly easier.
Enhanced Durability
Sealed marble is more resilient to scratches and marble etching, reducing the need for marble scratch removal and preserving its beauty for years
Easy Maintenance
Sealed marble is easier to clean and maintain, reducing the effort needed to keep it looking pristine.
How to Seal Marble Tile Step-By-Step
Preparation
- Clean the marble tile thoroughly using a mild detergent and warm water, specifically designed for marble cleaning.
- Allow the tile to dry completely before proceeding.
Test for Porosity
- Place a few drops of water on the sealing marble tile and observe how long it takes for the water to be absorbed.
- If the water is absorbed quickly, the tile is porous and will require multiple coats of sealer.
Apply Sealer
- Use a paint roller or brush to apply a penetrating marble tile sealer.
- Follow the manufacturer’s instructions for application and drying times.
Allow Drying Time
- Allow the seal marble to dry completely before applying a second coat, if necessary.
- Wait for the recommended drying time before using the tile.
Maintenance
- Marble tile should be sealed periodically to ensure it remains protected.
- Regular cleaning with a mild detergent and warm water is recommended to maintain the appearance of the tile.
Choosing the Right Sealer
Here’s how to make an informed choice:
Assess Your Marble
- Consider the type of marble you have. Some varieties are more porous than others and may require a specific type of sealer.
- Evaluate the location of your marble. Is it in a high-traffic area like a kitchen or a low-traffic zone like a bathroom?
Determine Your Priorities
- Do you prioritize maintaining the natural look of the marble, or are you looking for a high-gloss finish?
- How frequently are you willing to reseal your marble?
Seek Expert Advice
- Don’t hesitate to consult with professionals or specialists in stone care.
- They can provide tailored recommendations based on your marble and your goals.
Test the Sealer
Before applying any sealer to your entire marble surface, conduct a small test in an inconspicuous area to ensure it meets your expectations.
Read Product Labels
Pay close attention to the product labels and instructions provided by the manufacturer. They often contain valuable information on application and maintenance.
Prioritize Quality
Quality matters. Invest in a reputable sealer from a trusted brand, even if it costs a bit more. It will likely provide better protection and longevity.
Tools and Materials You'll Need
Before embarking on the marble sealing journey, it’s essential to gather the necessary tools and materials. Having everything at your fingertips will streamline the process and ensure a successful sealing job. Here’s a comprehensive list of what you’ll need:
Tools:
- Clean Cloth or Sponge: For wiping and cleaning the marble surface.
- Bucket: To mix cleaning solutions and for general use.
- Soft Bristle Brush or Broom: For removing dust and debris from the surface.
- Sealer Applicator: Options include a brush, roller, or sprayer, depending on the sealer type and your preference.
- Painter’s Tape: To protect adjacent surfaces from accidental sealer application.
- Plastic Sheeting: To cover and protect areas you don’t want to seal.
- Gloves: To protect your hands from chemicals.
- Safety Goggles: To shield your eyes from splashes.
- Respirator Mask: Especially important when working with solvent-based sealers in poorly ventilated areas.
- Rags or Paper Towels: For cleaning up spills and excess sealer.
Materials:
- Marble Cleaner: A pH-neutral cleaner designed for natural stone surfaces.
- Sealer: Choose either a penetrating sealer or a topical sealer, depending on your marble type and preferences.
- Stone Enhancer (Optional): If you want to enhance the color and appearance of your marble.
- Mineral Spirits (If Needed): For cleanup if you’re using a solvent-based sealer.
- Lint-Free Cloths: For buffing the surface after sealing.
- Drop Cloths: To protect the floor beneath your work area.
- Empty Containers: For mixing and diluting the sealer, if required.
- Labeling Materials: To mark containers with the type and date of sealer.
Sealing Polished Marble Tile
If you have marble flooring in your bathroom, the question of whether to seal it might be on your mind. Let’s delve into the essential considerations to help you decide.
Assessing the Need for Sealing
Sealing your bathroom floors is typically not necessary unless they are heavily soiled. The frequency of toilet use plays a role in this decision, as it can lead to stains on both the walls and the floor.
Time Since Last Use Matters
Surprisingly, the duration since your last toilet use matters more than the accumulated dirt. If it’s been a while since the bathroom was last used, the floor’s appearance won’t be significantly affected, even if it’s not spotless.
Cleaning with Caution
If you opt for cleaning, consider using a product containing ammonia to clean the grout lines between tiles. However, be cautious not to let the cleaner sit for too long, as it can harm the floor’s finish.
Professional Tile Restoration
For a more thorough solution, you can hire a tile restoration specialist. The cost for this service typically ranges from $100 to $400 per square foot, depending on the room’s size and the extent of damage.
Making the right choice regarding your marble bathroom flooring can ensure it looks pristine and well-maintained for years to come.
Sealing Marble Tile Before Grouting
The tile before grouting is an essential step in the installation process to protect and preserve the beauty of your marble surface. Marble is a porous natural stone, which means it can absorb liquids and stains easily. Using a high-quality marble floor sealer helps create a protective barrier, preventing grout and other substances from penetrating the stone. Here’s a step-by-step guide on how to seal marble tile before grouting.
Prepare the Area:
- Clear the area around the marble tiles to ensure there are no obstructions or debris.
- Cover any adjacent surfaces or items that you don’t want to accidentally spill sealer on, such as cabinets or appliances, with a drop cloth or plastic sheet.
- If desired, use painter’s tape to protect the edges of nearby surfaces from sealer drips.
Clean the Marble Tiles:
Start by thoroughly cleaning the marble tiles. Use a gentle, pH-neutral stone cleaner and a soft cloth or mop to remove any dust, dirt, or residue. Ensure the surface is completely dry before proceeding.
Choose the Sealer:
Select an appropriate marble sealer. There are two main types: penetrating sealers and enhancing sealers. Penetrating sealers go into the stone and provide protection without changing its appearance, while enhancing sealers can deepen the color of the marble and add a slight shine. Choose the one that suits your aesthetic preferences.
Apply the Sealer:
- Put on rubber gloves to protect your hands.
- Pour a small amount of sealer onto a clean, lint-free cloth or applicator pad.
- Begin applying the sealer evenly to the marble tiles. Work in small sections to ensure complete coverage.
- Use a circular or back-and-forth motion to spread the sealer across the surface.
- Allow the sealer to sit on the marble for the recommended dwell time specified on the product label. This time can vary depending on the brand and type of sealer.
Wipe Off Excess Sealer:
After the dwell time has elapsed, use a clean, dry cloth to wipe off any excess sealer from the surface. Make sure there are no streaks or puddles left behind.
Repeat if Necessary:
Depending on the type of sealer and the porosity of your marble, you may need to apply a second coat. Follow the manufacturer’s recommendations for reapplication if needed.
Let the Sealer Cure:
Allow the sealed marble tiles to cure for the recommended time specified on the sealer’s label before proceeding with grouting. This curing period can range from a few hours to 24 hours, depending on the product.
Grouting:
Once the sealer has cured, you can proceed with grouting the marble tiles. Follow the grouting instructions carefully, ensuring that you clean any grout residue from the surface promptly.
Sealing your marble tiles before grouting helps protect them from stains and makes maintenance easier in the long run. Be sure to follow the manufacturer’s instructions on the sealer’s label for the best results and long-lasting protection.
How to Seal Marble Tile After Grouting
Sealing marble tile after grouting is an important step to protect the stone and grout from stains and moisture. Here’s a step-by-step guide on how to properly seal marble tile:
Wait for the Grout to Cure:
Ensure that the grout has fully cured before sealing, which typically takes about 48-72 hours after grouting. Check the grout manufacturer’s recommendations for the exact curing time.
Clean the Surface:
If there is any grout haze or residue on the marble tile, clean it off using a grout haze remover or a mixture of mild dish soap and water. Follow the manufacturer’s instructions for the haze remover or use a soft cloth or sponge to gently clean the tile surface.
Prepare the Area:
If necessary, use painter’s tape to protect adjacent surfaces like walls or cabinets to prevent the sealer from accidentally staining them.
Choose the Right Sealer:
Marble is a porous stone, so you should use a penetrating or impregnating sealer designed specifically for natural stone. Read the manufacturer’s instructions for the specific sealer you’ve chosen.
Apply the Sealer:
Follow these steps to apply the sealer correctly:
- Pour a small amount of sealer onto the marble tile or onto an applicator pad.
- Spread the sealer evenly over the surface, working in small sections at a time. Use a gentle, circular motion to ensure thorough coverage.
- Let the sealer sit for the time specified in the manufacturer’s instructions. This typically ranges from 5 to 15 minutes, but it can vary depending on the product.
- Check for any excess sealer on the surface. If you see any, wipe it away with a clean, dry cloth.
- Repeat the process, applying a second coat if recommended by the manufacturer.
Allow the Sealer to Dry:
Let the sealer dry for the time indicated by the manufacturer, typically around 24 hours.
Test the Sealer:
To ensure the sealer is effective, perform a water drop test. Place a few drops of water on the sealed surface. If the water beads up and does not penetrate the marble, the sealer is working. If the water soaks into the marble, consider applying another coat of sealer.
Clean Up:
Dispose of any used cloths or applicator pads according to the sealer manufacturer’s instructions. Clean any tools or equipment immediately with water and soap.
Maintain the Sealed Surface:
Regularly clean your marble tile with a pH-neutral cleaner to preserve the seal and the beauty of your marble. Reapply the sealer as needed, which can vary depending on the sealer and the level of use, but it’s generally recommended every 1 to 3 years.
Remember that the frequency of resealing will depend on the type of sealer used, the amount of traffic the marble receives, and the manufacturer’s recommendations. Properly sealing and maintaining your marble tile will help keep it looking beautiful for years to come.
How to Seal Marble Tile Backsplash
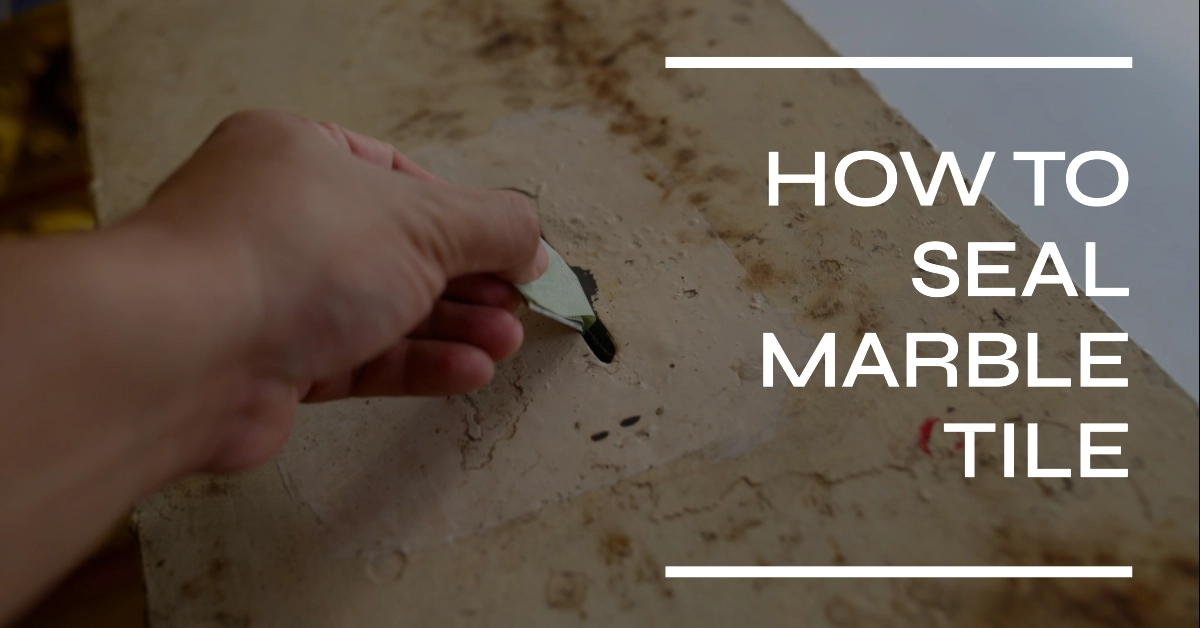
Marble tiles are beautiful, but they can be tough to clean. Consider sealing the grout between the tiles if you have marble flooring in your bathroom. This is an easy way to keep dirt from getting into the spaces.
Here are a few tips to follow to ensure the job goes well. First, you must ensure that the area where you’ll apply the sealant is arid. You should also use a small brush to eliminate loose debris in the grout lines. Then, you can apply the sealant with a sponge. Finally, let the mixture sit for at least 24 hours before wiping it off.
This will help the material bond properly and fill up the gaps. If you do everything correctly, you’ll never have to worry about cleaning your marble floors again.
Permanent Marble Tile Sealer
A permanent marble sealer is a specialized product used to protect and preserve marble surfaces, such as countertops, floors, and statues, from stains, water damage, and other forms of deterioration. Unlike temporary or short-term sealers, a permanent marble sealer is designed to provide long-lasting protection, reducing the need for frequent resealing.
Conclusion
Proper sealing is essential to preserve your marble tile’s natural beauty and extend its lifespan. By applying a high-quality penetrating sealer every 6-12 months and following correct application techniques, you’ll protect your investment from stains, etching, and moisture damage. Whether you choose to seal the tiles yourself or engage professional services, this critical maintenance step ensures your marble surfaces remain elegant and resilient for years to come.
Remember to consult the manufacturer’s guidelines and seek expert advice if needed. Contact us today at Stone Sealer Restoration for any query. With the right knowledge and care, your marble tiles will continue to shine and enhance the aesthetic appeal of your space for years to come.
FAQs
Where Can I Buy High-Quality Marble Sealers?
You can find premium marble sealers at Stone Sealer & Restoration. Visit their website for a wide selection of quality products.
Are There Any Special Care Tips For Colored Marble Tiles?
Colored marble may require extra care, as some sealers can affect the color. Consult with a professional for tailored advice.
Can I Use Household Cleaners On Sealed Marble?
While sealed marble is more resistant to stains, it’s still best to use pH-neutral cleaners to avoid any potential damage.
What’s The Cost Of Professional Marble Sealing Services?
The cost varies depending on the size of the area and the type of marble. Contact Stone Sealer & Restoration for a quote.
Is Sealing Marble Necessary For Bathroom Tiles?
Yes, bathrooms are high-moisture areas, making sealing crucial to prevent water damage and staining.
Our Services
Our Latest Posts
What Does Etching On Marble Look Like
Marble may look strong and timeless, yet its appearance can change quickly when exposed to...
How to Clean Concrete Floor | A Step-by-Step Guide for Sparkling Results
How to Clean Concrete Floor effectively is essential to maintaining its durability, visual appeal, and...

