
Polishing rocks at home does not require a rock tumbler or costly tools. A rotary tool gives you full control. With the right method, even rough stones can shine.
This guide explains How To Polish Rocks With A Dremel in a clear, safe, and proven way. Every step is written for beginners who want real results without damaging their stones.
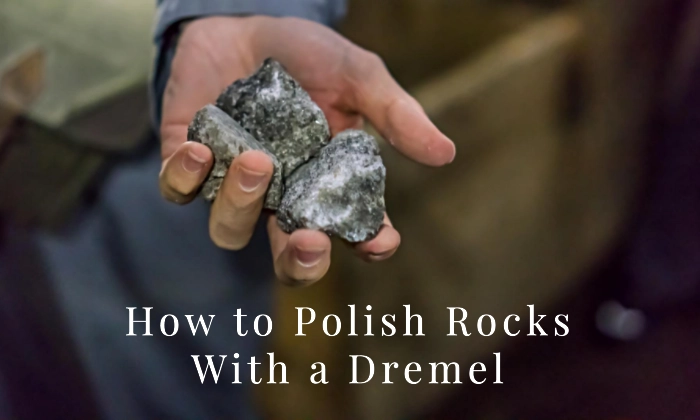
Why a Dremel Works for Rock Polishing
A Dremel is small, precise, and easy to handle. It lets you polish one stone at a time. This control matters when working with mixed shapes and hardness.
Many DIY users already own a rotary tool. Learning polishing rocks with a dremel saves money and space. It also avoids long tumbling cycles.
At Stone Sealer Restoration, we test tools on stone surfaces daily. The same principles used in marble polishing and concrete polishing also apply to small stones.
Preparing Your Rock for Polishing
A Dremel is small, precise, and easy to handle. It lets you polish one stone at a time. This control matters when working with mixed shapes and hardness.
Many DIY users already own a rotary tool. Learning polishing rocks with a dremel saves money and space. It also avoids long tumbling cycles.
At Stone Sealer Restoration, we test tools on stone surfaces daily. The same principles used in marble polishing and concrete polishing also apply to small stones.
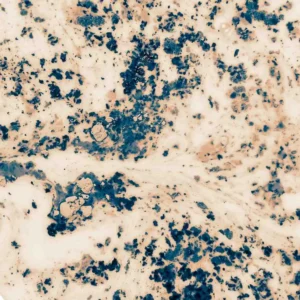
Types of Rocks You Can Polish at Home
Not every rock polishes well. Start with stones that respond to sanding.
Best options include:
Avoid soft stones like limestone or shale. They chip and stay dull.
If you are unsure, test a small area first. This prevents damage before full polishing.
Tools and Materials You Need
Before starting how to polish rocks with a dremel, gather everything. Missing tools lead to uneven results.
You will need:
- Dremel or rotary tool
- diamond grinding bits
- sanding drums and polishing wheels
- Polishing compound
- Water spray bottle
- Safety glasses
- Dust mask
- Gloves
Using the correct attachments matters more than speed.
Understanding Dremel Speed Settings
Speed control affects heat and surface quality. Too fast causes burns. Too slow wastes time.
Use variable speed settings:
- Grinding: Low to medium
- Sanding: Medium
- Polishing: Low
Always let the tool do the work. Pressure creates scratches.
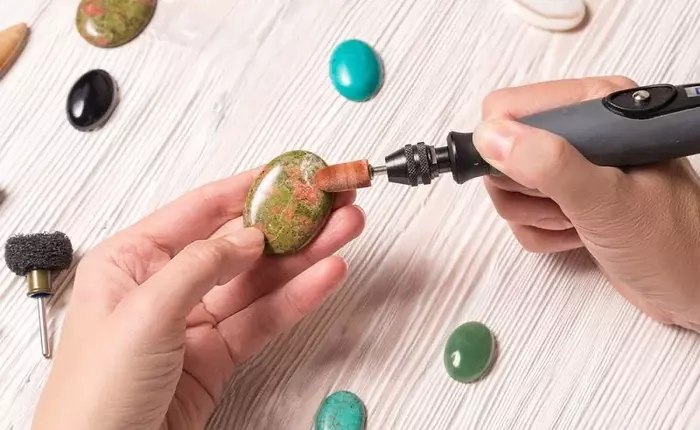
Step-by-Step Dremel Rock Polishing Process
This is the exact method professionals use when polishing rocks with dremel tools.
Step 1: Clean the Stone
Wash the rock with water and mild soap. Remove dirt and grit. Dry fully.
Any debris will scratch the surface during sanding.
Step 2: Shape the Rock
Use diamond grinding bits at low speed. Shape edges and remove deep flaws.
Keep the stone wet. Water controls dust and heat.
This step defines the final look.
Step 3: Start Sanding
Attach coarse grit sanding drums. Begin smoothing the surface.
Move evenly. Do not stay in one spot.
Gradually switch to finer grits. Each stage removes marks from the last.
This step is the heart of polishing rocks with a dremel.
Step 4: Fine Sanding
Use fine grit sanding bands. The stone should feel smooth before polishing.
If scratches remain, go back one grit. Skipping grits causes dull results.
Patience matters here.
Step 5: Apply Polishing Compound
Attach a felt or cloth wheel. Add a small amount of compound.
Use light pressure. Keep speed low.
This step turns smooth stone into shine. It completes the Dremel rock polishing process.
Wet vs Dry Polishing
Wet polishing is safer and cleaner. It reduces dust and heat.
Dry polishing works but requires breaks. Overheating damages stones.
For beginners learning to polish stones with a Dremel tool, water is strongly advised.
Common Mistakes Beginners Make
Avoid these errors when you polish rocks with dremel tools:
- Skipping sanding grits
- Using high speed too early
- Pressing too hard
- Polishing dry for too long
- Using worn-out bits
Fixing mistakes takes more time than doing it right once.
Safety Tips You Must Follow
Stone dust is harmful. Always protect yourself.
- Wear eye protection
- Use a dust mask
- Keep stones wet
- Work in a ventilated area
- Secure small stones with a clamp
Professional stone restoration follows these same rules.
How Long Does It Take to Polish One Rock?
Most stones take 30 to 60 minutes. Hard stones take longer.
Grinding and sanding consume most time. Polishing is quick.
Rushing ruins results.
Can You Polish Rocks Without a Tumbler?
Yes. rock polishing using rotary tool methods give better control.
Tumblers polish in bulk. Dremels polish with precision.
For jewelry, crafts, or display stones, a Dremel is the better choice.
When a Dremel Is Not Enough
Large slabs or floors need professional tools. That is where Stone Sealer Restoration helps.
We specialize in marble polishing, concrete polishing, and surface refinishing. Our packing service ensures stones and tools arrive protected and ready.
DIY is great for small projects. Large surfaces need trained hands.
Maintenance Tips After Polishing
- Clean stones with mild soap.
- Avoid harsh cleaners.
- Store polished stones separately.
- Hard stones scratch softer ones.
- Light hand polishing keeps shine longer.
Conclusion
Learning how to polish rocks with a Dremel opens up a rewarding hobby that transforms ordinary stones into stunning displays. Start with the right tools, follow proper grit progression, control your speed, and stay patient through each stage.
Your first attempts might not be perfect, but with practice, you’ll create beautiful polished stones that rival professional work. Ready to take your stone projects to the next level? Contact us for expert guidance or professional finishing services.
FAQs
Can you really polish rocks with a Dremel?
Yes. A Dremel works well for small stones. With the right bits, grit order, and speed control, you can achieve a smooth, glossy finish without a rock tumbler.
What Dremel bits are best for polishing rocks?
Diamond grinding bits are best for shaping. Sanding drums smooth the surface. Felt or cloth polishing wheels with compound create the final shine.
What speed should I use on a Dremel for rock polishing?
Use low to medium speed for grinding and sanding. Use low speed for polishing. High speed can burn the stone and cause deep scratches.
Do I need water when polishing rocks with a Dremel?
Yes. Wet polishing reduces dust, controls heat, and protects the stone. It also improves results and keeps the surface from cracking.
How long does it take to polish one rock with a Dremel?
Most rocks take 30 to 60 minutes. Hard stones like quartz may take longer. Time depends on stone hardness and surface condition.
Can beginners polish rocks with a Dremel safely?
Yes. Beginners can polish rocks safely by wearing eye protection, using water, keeping speeds low, and following the correct grit sequence.
What types of rocks polish best with a Dremel?
Quartz, agate, jasper, and river stones polish best. Avoid very soft stones like limestone or shale because they chip easily.
Is a Dremel better than a rock tumbler?
A Dremel is better for single stones, crafts, and jewelry. A tumbler is better for polishing many stones at once but offers less control.