

White and Gray Granite Countertops: Which is Suitable for You?...
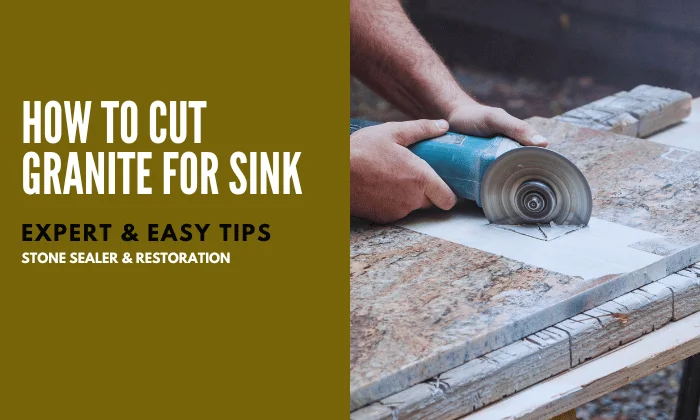
Read MoreHow To Cut Granite For Sink: Easy & Expert Tips
How to cut granite for sink– Installing a new sink in your granite countertop can transform your kitchen, but cutting granite for a sink installation may seem like a challenging task, even if you’re not a seasoned DIY enthusiast. Fear not, as we’re here to guide you through the process with expert tips on how to cut granite for sink. Whether you’re a DIY novice or a seasoned pro, our step-by-step instructions will help you achieve a flawless result, and we’ve got some essential tips to ensure you do it right. Ready to get started? Read more.
Gather Your Tools
Gathering the necessary granite cutting tools is the first crucial step when learning how to cut granite for sink. To ensure a smooth and safe cutting process, make sure you have the following items on hand:
Angle Grinder with a Diamond Blade:
This is the primary tool for cutting through the tough granite material. Ensure that the diamond blade is sharp and suitable for granite cutting.
Measuring Tape:
Accurate measurements are essential for a precise cut. Use a measuring tape to mark the dimensions of your sink accurately.
Pencil:
You’ll need a pencil to mark the cut lines on the granite countertop. Make sure the markings are clear and visible.
Safety Goggles:
Protect your eyes from flying debris and dust with safety goggles. Safety should always be a top priority.
Dust Mask:
Granite dust can be harmful when inhaled. A dust mask will help filter out airborne particles and keep your lungs safe.
Hearing Protection:
Cutting granite can be noisy. Protect your ears with hearing protection, such as earplugs or earmuffs.
Clamps:
Securely clamp the granite countertop to prevent any movement during the cutting process. This stability is crucial for accurate cuts and your safety.
Straight Edge or Level:
Use a straightedge or level to guide the angle grinder along the marked lines. This ensures straight and precise cuts.
Water Source:
To prevent overheating of the diamond blade and reduce dust, you’ll need a water source for cooling the cutting area. A spray bottle or a hose with a gentle flow will suffice.
With these tools at your disposal, you’ll be well-prepared to tackle the task of cutting granite for your sink installation. Remember to prioritize safety by wearing the necessary protective gear throughout the process.
Measure and Mark
The Measure and Mark step is a critical phase in the process of cutting granite for a sink. Accurate measurements and precise markings are essential to ensure that the sink fits perfectly into the countertop. Here’s a detailed guide on how to measure and mark for cutting granite:
Gather Your Tools:
- Measuring tape
- Pencil
- Straight Edge or level
- Safety goggles (for protection while marking)
- Clamps (to secure the countertop)
Clear the Work Area:
Ensure the work area is clean and free from any clutter. It’s essential to have a clear, flat surface to work on.
Take Accurate Measurements:
- Begin by measuring the dimensions of your sink. Measure the width, length, and depth of the sink. Take precise measurements and note them down.
- Measure the sink’s placement within the countertop. Determine the distance from the edges of the countertop to the sink’s edges. Ensure equal spacing on all sides for a balanced look.
Mark the Cut Lines:
- Using the measurements you’ve taken, mark the cut lines on the granite surface. Use a pencil to make these marks. It’s a good practice to mark on the side of the granite that will be discarded to prevent visible markings on the finished side.
- If your sink has rounded corners, use a round object or a template to create rounded corners on your markings.
Use a Straightedge or Level:
- Place a straightedge or level along the marked lines. This will help ensure that your cut lines are straight and even. Secure the straightedge in place with clamps if necessary.
- Double-check your measurements and alignment before proceeding.
Verify Your Markings:
- Carefully review your markings to confirm that they match the sink’s dimensions and placement. Any inaccuracies at this stage can lead to problems during the cutting process.
Make Any Additional Markings:
- If you plan to install additional fixtures such as faucets or soap dispensers, mark their positions as well. This will help you avoid any conflicts when cutting the granite.
Recheck and Confirm:
- Before moving on to the cutting phase, double-check all your measurements and markings to ensure they are accurate. Precision at this stage is crucial for a successful sink installation.
By following these steps, you’ll be well-prepared to make precise and well-informed markings on your granite countertop, setting the stage for a successful sink installation. Remember to prioritize safety by wearing safety goggles while marking and throughout the cutting process.
Secure the Granite
Securing the granite countertop is a crucial step in the process of cutting granite for a sink. Properly securing the countertop ensures stability, accuracy, and, most importantly, safety during the cutting process. Here’s how to securely fasten the granite:
Prepare Your Work Area:
- Clear the work area of any debris or obstacles that could interfere with the process.
- Ensure you have enough space to work comfortably around the granite countertop.
Place the Granite on a Stable Surface:
- Position the granite countertop on a flat, stable surface. If you have a workbench or a set of sawhorses, these can provide the necessary support.
- Ensure that the granite is level and balanced on the surface to prevent tilting or wobbling.
Use Clamps:
- Secure the granite countertop in place using clamps. Clamps will prevent any movement or shifting during the cutting process, which is essential for precise cuts and safety.
- Place the clamps strategically along the edges of the countertop, ensuring they don’t obstruct the path of the angle grinder.
Check for Stability:
- After applying the clamps, check the stability of the granite countertop. Gently push and pull on it to ensure it’s firmly held in place.
- Verify that the countertop is level and doesn’t wobble. Make any necessary adjustments to the clamps or the surface beneath the granite to achieve stability.
Secure Surrounding Items:
If there are any nearby objects or items that could be affected by the cutting process (e.g., other countertops, cabinets, appliances), make sure they are adequately protected or moved out of the way to avoid damage.
Double-Check Clamps:
Before you begin cutting, double-check the clamps one last time to ensure they are still firmly holding the granite in place. You want to be certain that the countertop won’t shift during the cutting process.
Ensure a Safe Work Environment:
As an additional safety measure, make sure your work area is well-ventilated, and you are wearing the appropriate safety gear, including safety goggles, a dust mask, and hearing protection.
Securing the granite countertop is a fundamental step in the process of cutting granite for a sink. Taking the time to properly fasten the countertop will help ensure that your cutting is precise, safe, and successful. Always prioritize safety throughout the entire cutting process.
Wear Protective Gear

Wearing the appropriate protective gear is of utmost importance when cutting granite for a sink. Granite cutting generates dust, noise, and potential hazards, so it’s crucial to protect yourself from harm. Here’s a detailed guide on the protective gear you should wear:
Safety Goggles:
Safety goggles or safety glasses with side shields should be worn at all times. These protect your eyes from flying granite particles, dust, and debris that can result from cutting.
Dust Mask or Respirator:
A dust mask or a respirator is essential to prevent inhaling airborne granite dust. Inhaling granite dust can be harmful to your respiratory system. Choose a mask with appropriate filtration capabilities.
Hearing Protection:
Cutting granite can be extremely noisy, potentially causing hearing damage. Wear earplugs or earmuffs to protect your ears from excessive noise levels.
Work Gloves:
While gloves are not typically needed during the actual cutting process, wearing work gloves when handling the granite and any sharp tools can protect your hands from cuts and abrasions.
Long-Sleeved Clothing:
Long-sleeved clothing can provide an additional layer of protection against dust and debris. It also helps protect your arms from accidental contact with the angle grinder.
Safety Footwear:
Sturdy, closed-toe shoes or boots with non-slip soles are essential to protect your feet from falling objects and potential hazards in the workspace.
Hair Protection:
If you have long hair, tie it back or wear a hat to prevent it from getting caught in the angle grinder or coming into contact with dust.
Face Shield (Optional):
If you prefer extra protection, especially for your face, you can wear a full-face shield in addition to safety goggles. This provides additional coverage and protection.
Apron (Optional):
An apron can protect your clothing from dust and debris, but it’s not always necessary. It’s more commonly used in professional settings.
Safety Shoes (Optional):
Depending on the work environment and potential hazards, steel-toed safety shoes may be considered for added protection.
Start Cutting
Using the angle grinder equipped with a diamond blade, carefully begin cutting along the marked lines. Ensure a steady hand and keep the grinder’s speed at a moderate level to prevent overheating. Don’t rush this step; take your time for precise cuts.
Keep It Cool
To prevent the blade from overheating and the granite from cracking, periodically cool the surface with water. A continuous, slow trickle of water on the cutting area will help dissipate heat.
Finishing Touches

The Finishing Touches stage is a crucial step in the process of cutting granite for a sink. It involves refining the cut edges to ensure a clean and professional appearance. You can take guidance from tile edge trim ideas by Stone Sealer & Restoration. Here’s a step-by-step guide on how to complete this phase:
1. Gather Your Tools:
- Sandpaper or diamond polishing pads (grit ranging from 50 to 3000)
- Water source or a spray bottle
- Safety goggles
- Dust mask or respirator
- Hearing protection (if the angle grinder is used)
- Work gloves
2. Put on Protective Gear:
Prioritize safety by wearing safety goggles, a dust mask or respirator, and hearing protection if using power tools.
3. Smooth the Edges:
- Start by using lower-grit sandpaper or a diamond polishing pad (around 50 to 100 grit) to smooth the rough edges left by the cutting process.
- Work in a controlled manner, applying even pressure as you move the sandpaper or polishing pad along the cut edges.
4. Gradually Increase Grit:
- As you progress, switch to higher-grit sandpaper or polishing pads (e.g., 200, 400, 800, 1500, and 3000 grit) to achieve a finer finish.
- For optimal results, follow a gradual progression from lower to higher grits, ensuring that each step removes the marks from the previous one.
5. Use Water for Lubrication:
To prevent overheating and maintain a smooth finish, keep the granite surface moist. You can use a spray bottle to apply a fine mist of water as you work. This also helps control dust.
6. Inspect Your Work:
Periodically inspect the edges to ensure they are smooth and free from rough spots or imperfections. Make any necessary adjustments as needed to achieve the desired finish.
7. Round Corners (If Necessary):
If your sink opening includes rounded corners, like those found in bullnose edge countertops, use sandpaper or diamond polishing pads to create smooth, rounded edges. Be patient and take your time to achieve the desired curvature.
8. Clean and Dry the Area:
Once you are satisfied with the finish, thoroughly clean the area to remove any dust, debris, or water residue. A clean surface will allow you to assess the quality of your work.
9. Inspect and Test Fit:
Before proceeding with sink installation, carefully inspect the cut edges to ensure they meet your standards. Test-fit the sink to ensure it fits snugly and securely within the opening.
10. Proceed with Sink Installation:
Once you are confident in the quality of your cut and the smoothness of the edges, you can proceed with installing your sink according to the manufacturer’s instructions.
11. Seal the Edges (Optional):
To enhance the longevity of your granite and prevent water damage, consider using guidance on how to seal granite provided by Stone Sealer & Restoration to seal the cut edges and the entire countertop surface. Follow the product instructions for application.
Install Your Sink
Installing your sink into the granite countertop is the final and crucial step in the process of cutting granite for a sink. Follow these step-by-step instructions to ensure a successful and secure installation:
Gather Your Sink Installation Materials:
- Sink (with any included mounting hardware)
- Sink clips or brackets (if not included with the sink)
- Silicone adhesive or sealant
- Screwdriver or drill
- Adjustable wrench
- Measuring tape
- Pencil
Prepare the Sink and Countertop:
- Clean the sink thoroughly to remove any dust, debris, or residue.
- Check the sink’s edges for any sharp or uneven areas, and smooth them if necessary.
- Clean the cut edges of the granite countertop to ensure a clean and smooth surface.
Measure and Mark the Sink Placement:
Measure and mark the exact placement of the sink within the sink hole on the granite countertop. Double-check your measurements to ensure accuracy.
Apply Silicone Adhesive:
Apply a continuous bead of silicone adhesive or sealant along the top edge of the sink cutout on the granite countertop. Make sure the adhesive is evenly applied and covers the entire perimeter of the sink opening.
Position the Sink:
Carefully place the sink into the sink cutout, aligning it with the marks you made earlier. Be sure to seat the sink evenly and securely within the opening.
Attach Sink Clips or Brackets:
- If your sink requires additional support, use the included sink clips or brackets to secure it to the underside of the countertop.
- Follow the manufacturer’s instructions for proper placement and attachment.
Secure the Sink:
Use a screwdriver or drill to tighten the sink clips or brackets, ensuring that the sink is held firmly in place. Be careful not to overtighten, as this can crack the sink or countertop.
Wipe Off Excess Adhesive:
Clean off any excess silicone adhesive or sealant that may have squeezed out from under the sink. A damp cloth or sponge can be used for this purpose.
Allow the Adhesive to Cure:
Refer to the adhesive manufacturer’s instructions for the recommended curing time. It’s essential to allow the adhesive to set and form a secure bond.
Reconnect Plumbing:
Reconnect the plumbing components, including the faucet, drain, and any other fixtures, according to the manufacturer’s instructions.
Test for Leaks:
Turn on the water and check for any leaks around the sink and plumbing connections. Address any leaks promptly by tightening or adjusting connections as needed.
Seal the Sink Edges (Optional):
Consider applying a granite sealer, such as Stone Sealer & Restoration, to the edges of the sink where it meets the countertop. This will help prevent water damage and staining.
Clean and Finish:
Clean the sink and countertop thoroughly to remove any residual adhesive, fingerprints, or debris. Polish the sink’s surface if necessary to restore its shine.
Congratulations! You have successfully installed your sink into the granite countertop. With proper care and maintenance, your new sink should provide years of functionality and enhance the beauty of your kitchen or bathroom.
Seal the Granite
Sealing the granite countertop is a crucial step in the sink installation process, as it helps protect the stone from stains, moisture damage, and other potential issues. To seal the granite around your sink, follow these steps:
Gather Your Materials:
- Granite sealer (such as Stone Sealer & Restoration)
- Clean, lint-free cloths or paper towels
- Plastic wrap or plastic sheeting (optional)
- Painter’s tape (optional)
Clean the Countertop:
Ensure that the granite countertop and the area around the sink are thoroughly clean and dry. Remove any dust, dirt, or debris from the surface.
Read the Product Instructions:
Carefully read the instructions on the granite sealer product you have chosen. Different sealers may have specific application instructions and recommended drying times.
Ventilate the Area:
If the sealer product recommends good ventilation, open windows or doors to ensure proper air circulation during the application process.
Test a Small Area (Optional):
Before applying the sealer to the entire countertop, it’s a good practice to test a small, inconspicuous area to ensure that the sealer does not cause any discoloration or adverse reactions with your granite.
Apply the Sealer:
- Pour a small amount of the granite sealer onto the countertop near the sink.
- Using a clean cloth or paper towel, spread the sealer evenly over the surface. Work in a circular or back-and-forth motion.
- Ensure that the sealer covers the edges of the sink cutout, as this area is particularly susceptible to moisture infiltration.
Allow the Sealer to Absorb:
Let the sealer sit on the countertop for the recommended time specified in the product instructions. This allows the granite to absorb the sealer and create a protective barrier.
Check for Absorption:
After the recommended time, check for absorption by placing a few drops of water on the countertop. If the water beads up, the sealer is effective. If it is absorbed, you may need to apply an additional coat.
Apply Additional Coats (If Needed):
If the sealer is absorbed quickly, repeat the application process for an additional coat. Follow the same steps as before.
Wipe Off Excess Sealer:
Using a clean, dry cloth or paper towel, wipe off any excess sealer from the countertop. Pay special attention to the sink edges and any seams.
Allow the Sealer to Dry:
Let the sealed countertop dry for the recommended time specified in the product instructions. Avoid using the sink or placing any objects on the countertop during this time.
Clean Up (Optional):
After sealing your granite countertop, remove protective materials like plastic wrap or painter’s tape carefully once the sealer is dry. For additional tips on how to clean granite countertops , continue reading.
Sealing your granite countertop ensures long-term protection and maintains its natural beauty. The frequency of resealing may vary depending on the type of sealer used, the quality of the granite, and how heavily the countertop is used. Refer to the product instructions for recommendations on when to reapply the sealer to keep your granite looking its best.

Conclusion
Cutting granite for a sink installation can be a challenging task, but with the right tools, safety precautions, and our expert tips, you can achieve a flawless result. Whether you’re a DIY enthusiast or a seasoned pro, following these steps will help you create a beautiful and functional kitchen upgrade. Don’t forget to protect your investment by sealing your granite countertop with Stone Sealer & Restoration to ensure it stays in top condition for years to come. If you have any questions or need further assistance, please don’t hesitate to contact us.
FAQ's
What Tools Do I Need To Cut Granite For A Sink Installation?
To cut granite for a sink, you’ll need an angle grinder with a diamond blade, measuring tape, a pencil, safety goggles, a dust mask, hearing protection, clamps, a straightedge or level, and a water source for cooling the blade.
How Do I Measure And Mark The Granite For The Sink Cutout Accurately?
Measure and mark the sink’s dimensions precisely on the granite countertop using a measuring tape, pencil, and straightedge. Double-check your measurements to ensure accuracy.
Why Is It Important To Secure The Granite During Cutting?
Securing the granite with clamps ensures stability and prevents movement during cutting, ensuring precise cuts and safety.
What Protective Gear Should I Wear When Cutting Granite For A Sink?
Safety goggles, a dust mask or respirator, hearing protection, and work gloves are essential protective gear to safeguard against dust, debris, and potential hazards.
How Do I Start Cutting The Granite For The Sink Opening?
Begin by positioning the angle grinder with a diamond blade along the marked cut lines, ensuring the grinder is at full speed before making contact with the granite. Take your time and maintain a consistent speed.
What Are Some Tips For Maintaining Safety During The Cutting Process?
Always wear protective gear, secure the granite, maintain a steady hand, and use a controlled cutting speed to ensure safety.
What Should I Do After Cutting The Sink Opening In The Granite?
After cutting, you should smooth and refine the edges using sandpaper or diamond polishing pads. This step is crucial for a clean and professional finish.
How Do I Install The Sink In The Granite Countertop After Cutting?
To install the sink, apply silicone adhesive, position the sink, secure it with sink clips or brackets if necessary, and allow the adhesive to cure before reconnecting plumbing.
Is It Essential To Seal The Granite Around The Sink?
Yes, sealing the granite is recommended to protect it from stains and moisture damage. A quality granite sealer, such as Stone Sealer & Restoration, can help maintain the countertop’s appearance and longevity.
How Often Should I Reseal The Granite Countertop Around The Sink?
The frequency of resealing depends on factors like the type of sealer used and the countertop’s usage. Refer to the sealer’s instructions for recommended resealing intervals, but it’s typically done every 1 to 2 years.
Our Services
Our Recent Post

Black And White Granite Countertops: Which Is Right For You?
Black And White Granite Countertops: Which Is Right For You?...
Read More
Elevate Your Countertop Kitchen Decor with Marble or Granite
Elevate Your Countertop Kitchen Decor with Marble or Granite When...
Read More
Tile And Grout Cleaning Services
Tile and grout cleaning services by Stone Sealer Restoration -...
Read More