
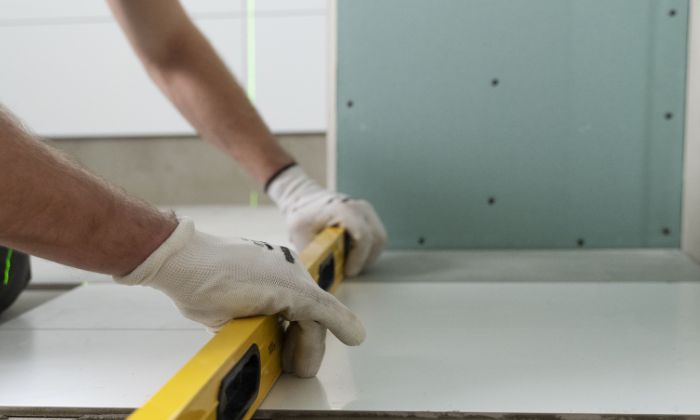
Granite countertops are a popular choice for kitchens and bathrooms due to their durability, natural beauty, and timeless appeal. However, granite is a porous stone, which means it can absorb liquids and become stained or damaged over time.
To protect and maintain the beauty of your granite countertops, it’s essential to seal them properly. In this guide, we’ll walk you through everything you need to know about how to seal granite countertops, why it’s important, and how to maintain them long-term.
Why Sealing Granite Countertops Is Important
Sealing your granite countertops is a critical step in ensuring their longevity and appearance. Here’s why:
Preventing Stains
Granite is naturally porous, which allows water, oils, and other liquids to penetrate the stone if left unsealed. When you seal granite, you create a protective barrier that helps repel liquids.
This prevents staining from everyday substances like lemon juice, oils, and water. By sealing granite countertops, you ensure that they remain stain-free and maintain their original look.
Maintaining Durability
Sealing granite counters also contributes to their durability. Without proper sealing, liquids can seep into the stone and cause cracking, discoloration, and other damage over time. Regular sealing keeps your granite countertops strong, preventing the stone from becoming weakened by trapped moisture.
Enhancing Appearance
A sealed granite countertop not only stays protected but also maintains its natural shine and shine. The sealant enhances the stone’s appearance, making the colors and patterns pop while keeping the surface smooth. Sealing granite helps preserve its polished look, allowing your kitchen or bathroom to stay looking fresh.
How to Know If Your Granite Countertop Needs Sealing
How can you tell if your granite countertops need resealing? Fortunately, there are simple methods to determine whether it’s time to apply a new layer of sealant.
Water Test Method
One of the easiest ways to check if your granite needs resealing is by performing a water drop test. Pour a small amount of water (about a few drops) onto the surface of the granite. Let it sit for about 15-20 minutes. If the water beads up and stays on the surface, your granite is still sealed. If it absorbs into the stone or leaves a dark spot, it’s time to reseal the countertop.
Signs of an Unsealed Countertop
Besides the water test, there are visual signs that indicate your granite is unsealed or needs resealing. Look for dullness, discoloration, or areas where liquids soak in rather than bead up. If your granite countertop has lost its shine or becomes prone to staining, it’s a sign that the sealant has worn off.
What You’ll Need to Seal Granite Countertops
Before sealing your granite countertop, gather the following materials:
- Granite-safe cleaner
- Clean, dry cloths
- Granite sealer (penetrating stone sealer)
- Sponge or applicator pad
- Soft microfiber cloth for buffing
Step-By-Step Guide to Sealing Granite Countertops
Follow this step-by-step process to seal your granite countertops effectively:
Step 1: Clean the Countertop
The first step in sealing granite countertops involves cleaning the surface thoroughly. Use a cleaner specifically designed for granite to remove dirt, grease, and residue. This step is crucial because any debris left behind can interfere with the sealant’s ability to penetrate the stone properly.
Avoid using harsh chemicals that may damage or dull the granite. Ensuring the surface is spotless helps the sealant bond effectively, maintaining the countertop’s durability and appearance. Let the countertop dry completely before proceeding to the next step in the sealing process.
Step 2: Allow the Countertop to Dry
After cleaning your countertop, it’s essential to let it dry completely before applying sealant. Any moisture left on the surface can prevent the sealant from absorbing properly into the stone. To ensure it’s fully dry, wait at least 30 minutes after cleaning.
This drying period allows water or cleaning solution to evaporate, ensuring the granite is ready to be sealed without any interference. Drying the countertop thoroughly is a crucial step for effective sealing, as moisture can reduce the sealant’s performance and leave the surface unprotected.
Step 3: Apply the Sealer
Once the countertop is dry, it’s time to apply the sealant. Pour a small amount directly onto the granite or use a spray bottle for even distribution. Use a clean cloth or sponge to spread the sealant evenly across the surface, ensuring the entire countertop is covered, including the edges and corners.
Avoid using too much, as this can result in a sticky or streaky finish. Applying the right amount ensures proper protection without leaving any residue, making the countertop look flawless and long-lasting.
Step 4: Let the Sealer Absorb
After applying the sealer, let the sealer absorb into the granite for 15-20 minutes. This time is crucial as it allows the sealer to penetrate the stone’s pores fully, creating a protective barrier.
This deep absorption helps the sealer form a strong shield that guards the granite against liquids, stains, and potential damage. By allowing the sealer to soak in properly, you ensure long-lasting protection, keeping the stone’s surface both beautiful and resistant to everyday wear and tear.
Step 5: Wipe Off Excess Sealer
After the sealer has been absorbed, take a clean cloth to wipe away any excess product. This step is crucial to avoid a sticky or hazy finish on the surface. Gently buff the area in circular motions until it feels smooth and dry to the touch.
Leaving too much sealer can result in a less-than-perfect finish. After wiping off the excess, let the surface rest and fully cure for at least 48 hours before using it to ensure the sealer sets properly, giving long-lasting protection.
Step 6: Allow the Sealer to Cure
After removing the excess sealer, let it cure for approximately 24 hours. During this period, avoid placing objects on the surface or using the countertop. The curing process allows the sealer to bond effectively with the granite, ensuring optimal protection against stains, moisture, and damage.
Skipping or shortening this step can compromise the durability and longevity of the sealer, leaving your granite more vulnerable. Patience during curing is essential for achieving the best possible results and preserving the beauty and functionality of your granite countertop for the long term.
How to Reseal Granite Countertops
Resealing granite countertops involves a process similar to the initial sealing. Begin by evaluating the countertop’s condition and conduct a water test: sprinkle water on the surface and observe if it beads up. If the water no longer forms beads and instead soaks in, it indicates that the sealant has worn off.
To reseal, clean the surface thoroughly, apply a high-quality granite sealer evenly, and allow it to penetrate for the recommended time before wiping off any excess. This maintenance ensures the granite remains protected from stains and damage, preserving its beauty and longevity.
Common Mistakes to Avoid When Sealing Granite Countertops
While sealing granite is relatively simple, there are some common mistakes to avoid:
Sealing Dirty or Wet Countertops
Before sealing granite countertops, it’s essential to clean and dry the surface thoroughly. Applying a sealer over dirty or wet countertops can trap dirt and moisture beneath the sealant. This not only prevents the sealer from adhering correctly but can also lead to damage, such as discoloration or mold growth.
For optimal results, ensure the granite is spotless and completely dry to create a strong bond with the sealer, enhancing protection and longevity. Taking these steps helps maintain the beauty and integrity of your countertops while ensuring effective sealing.
Applying Too Much or Too Little Sealer
Using the right amount of sealer is essential for optimal protection of surfaces. Applying too much sealer can create a sticky residue, making the surface difficult to clean and use.
This excess can also lead to unevenness and attract dirt, reducing the aesthetic appeal. Conversely, using too little sealer compromises the protective barrier, leaving surfaces vulnerable to stains, spills, and damage.
Proper application ensures that the sealer penetrates effectively, providing a durable shield while maintaining the surface’s appearance. Striking the right balance is crucial for achieving long-lasting results and preserving the integrity of the material.
Not Allowing the Sealer to Absorb Properly
Not allowing the sealer to absorb properly can compromise its effectiveness. It’s crucial to follow the manufacturer’s recommendations, typically allowing the sealer to sit for 15-20 minutes.
During this time, the sealer penetrates the surface, providing an even and effective protective barrier. If you rush this step, you may end up with an uneven application, leading to areas that remain vulnerable to stains, moisture, and damage.
Proper absorption ensures that the sealer performs as intended, enhancing the durability and appearance of your surfaces, ultimately extending their lifespan and maintaining their aesthetic appeal.
Using Incorrect or Low-Quality Sealers
Using incorrect or low-quality sealers can compromise the protection of your granite surfaces. It’s essential to select a penetrating sealer formulated specifically for granite, as these products are designed to penetrate the stone effectively and create a protective barrier against stains, moisture, and wear.
Low-quality sealers may not offer adequate protection, resulting in faster deterioration, discoloration, and damage over time. Investing in the right sealer ensures your granite remains beautiful and durable, extending its lifespan and maintaining its appearance. Always prioritize quality to safeguard your investment in granite countertops or surfaces.
Tips for Long-Term Maintenance of Sealed Granite
Proper maintenance will help extend the lifespan of your sealed granite countertops:
Proper Cleaning Methods and Products
To maintain the beauty and longevity of granite countertops, it’s essential to clean them regularly using a granite-safe cleaner. These products are specifically formulated to clean without harming the stone or its protective sealant.
Avoid harsh chemicals such as bleach or ammonia, as they can degrade the sealer, leading to potential damage and stains on the stone. Instead, opt for gentle, pH-balanced cleaners that effectively remove dirt and grime while preserving the integrity of the granite. Regular cleaning not only keeps your countertops looking great but also extends their lifespan.
Avoiding Harsh Chemicals That Can Degrade the Sealer
To maintain the integrity of your granite surfaces, it’s essential to avoid harsh chemicals that can degrade the sealer. Instead, use cleaners specifically formulated for natural stone, as they are gentle yet effective. Abrasive or acidic cleaners can strip away the protective sealant, leaving the granite vulnerable to stains and damage.
By opting for the right cleaning products, you ensure that the sealer remains intact, preserving the beauty and durability of your granite countertops and surfaces for years to come. Protect your investment by choosing the appropriate care products for optimal results.
How to Reapply Sealer Over Time
To maintain the protection and appearance of your countertops, it’s essential to reapply sealer regularly, particularly in high-traffic areas. Conduct the water drop test every 6 to 12 months by placing water droplets on the surface.
If they absorb quickly, it’s time to reseal. Ensure the surface is clean and dry before applying a new layer of sealer. Following this routine will help prevent stains and damage, keeping your countertops in optimal condition and enhancing their longevity. Regular resealing not only protects but also preserves the aesthetic appeal of your surfaces.
FAQs
How to Seal Granite Countertops for the First Time?
If you’re sealing your granite countertops for the first time, follow the same step-by-step guide outlined above. The process is straightforward, but take care to choose a high-quality granite sealer and clean the surface thoroughly before applying it.
How Often to Seal Granite Countertops?
Granite countertops typically need resealing every 1-3 years, depending on usage and the type of sealer used. Regular water tests can help determine when it’s time to reseal.
How Long to Wait After Sealing Granite Countertops?
You should wait at least 24 hours after sealing your granite countertop before using it. This gives the sealer enough time to fully cure.
What Happens If You Don’t Seal Granite Countertops?
If you don’t seal granite countertops, they become susceptible to staining, discoloration, and moisture damage. Over time, unsealed granite can crack and lose its shine.