How to Cut Granite is a skill that combines precision, patience, and the right tools. Granite, a natural stone prized for its durability and elegance, has become a staple in modern construction and design. From sleek countertops to stunning backsplashes, granite adds a timeless appeal to any space. However, its hardness requires careful handling to achieve the perfect cut without damaging the material or compromising its beauty.
In this guide, we’ll explore how to cut granite step by step. Whether you’re working on a new countertop, creating a sink cutout, or modifying an existing installation, mastering proper cutting techniques is essential. You’ll also learn about the necessary tools, safety measures, and tips to maintain granite’s integrity during and after the cutting process. Let’s get started!
What to Know Before You Start Cutting Granite Countertops
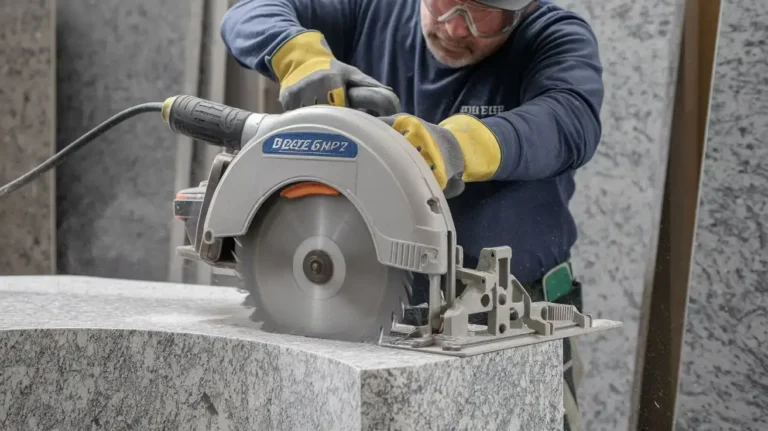
Assessing the Type and Thickness of Granite
Granite countertops vary in type, thickness, and density, all of which influence the cutting process. Thicker slabs require more robust tools, while softer types of granite may need extra care to prevent chipping. Always measure the thickness of the granite and check its grade to determine the ideal cutting technique. Knowing the properties of your countertop ensures precise results.
Understanding the Tools Needed and Safety Precautions
An angle grinder equipped with a diamond blade is one of the most effective tools for cutting granite. Along with this, you’ll need safety gear such as gloves, goggles, and a dust mask to protect yourself from debris and fine granite dust. Ensure that your workspace is well-ventilated and secure the granite firmly with clamps to avoid movement during the cut.
Why Preparation is Crucial for a Smooth Cutting Process
Proper preparation can make or break the success of your project. Start by marking the cutting lines using a straightedge and tape for precision. Double-check your measurements to ensure accuracy. Preparing the surface with masking tape along the cut line minimizes the risk of chipping and keeps the edges clean. A well-prepped workspace and clear plan save time and reduce costly errors.
Common Mistakes to Avoid Before Starting
- Skipping the use of masking tape, leading to chipped edges.
- Using an incorrect blade that dulls quickly or damages the granite.
- Failing to secure the countertop, resulting in uneven cuts.
- Cutting too quickly, which can cause cracks or overheating the angle grinder blade.
Quick Reference Table for Preparation
Preparation Step | Details |
Measure Granite Thickness | Use a tape measure; account for slab density. |
Choose the Right Tools | Diamond blade, angle grinder, clamps. |
Mark Cutting Line | Use tape and straightedge for accuracy. |
Safety Gear | Goggles, gloves, and a dust mask. |
By understanding these essentials and avoiding common mistakes, you can confidently cut the granite countertops with precision and safety.
Essential Requirements for Cutting Granite
When learning how to cut granite, preparation and the right tools are crucial for achieving professional results. Granite’s hardness and density demand specific equipment and a well-organized workspace to ensure smooth, precise cuts. Below are the essential requirements to make your project successful.
Tools and Materials Checklist
The following tools are indispensable for cutting granite surfaces effectively:
- Handheld saws: Ideal for versatility and maneuverability, particularly for smaller granite slabs.
- Diamond blades: These are designed specifically for granite’s toughness, ensuring smooth and clean cuts.
- Safety gear: Always wear goggles, gloves, and a dust mask to protect yourself from flying debris and dust.
- Clamps and markers: Secure the granite slab and mark the cutting lines for accuracy before starting.
Choosing the Right Blade for Precision Cuts
Selecting the proper blade is critical for straight cuts and a polished finish. A diamond blade compatible with your cutting tool is the best option for granite. For a wet cut, use a blade designed to work with water to minimize dust and heat buildup. Wet cutting also extends the blade’s lifespan and ensures a smoother edge on granite surfaces.
Setting Up a Stable and Dust-Free Workspace
A stable workspace prevents movement during the cutting process, ensuring clean and accurate cuts. Use sturdy sawhorses or a solid workbench to hold the granite securely. Keep the area as dust-free as possible by using a wet cutting method, which reduces airborne particles and improves visibility. Always work in a well-ventilated space to avoid inhaling fine granite dust.
Quick Reference Table for Granite Cutting Essentials
Requirement | Details |
Cutting Tool | Handheld saws with diamond blades. |
Blade Type | Wet cutting blade for smooth edges and dust control. |
Workspace Stability | Secure granite with clamps on a solid surface. |
Safety Equipment | Gloves, goggles, and a dust mask. |
By using the right tools, selecting an appropriate blade, and preparing a stable workspace, you can master how to cut granite with precision. These requirements ensure safety, efficiency, and professional-grade results for your granite cutting projects.
How to Cut a Granite Countertop
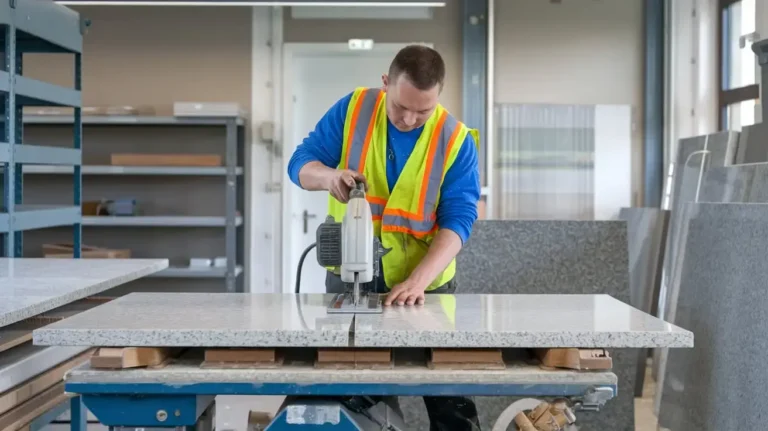
At Stone Sealer Restoration, we specialize in professional granite countertop installation services, including cutting, installation, and countertops and marble restoration. For those tackling the task themselves, knowing how to cut a granite countertop is essential to achieving precise and clean results. Below is a step-by-step guide to ensure you handle the process like a pro while protecting the integrity of this stunning natural stone.
1. Measuring and Marking the Cutting Area
Start by using a tape measure to mark the exact dimensions of the cut on the granite slab. Use a straightedge to draw the cut line, ensuring it is clear and accurate. Apply masking tape over the cut line to reduce chipping during the cutting process. Precision at this stage is critical to achieving the perfect fit.
2. Securing the Countertop for Stability
Place the granite slab on a sturdy surface in a well-ventilated work area. Use clamps to firmly hold the granite in place, preventing movement during the cutting process. A stable countertop ensures straight cuts and reduces the risk of accidents or uneven edges.
3. Techniques for Making Straight and Clean Cuts
- Choose the Right Cutting Tool: A handheld angle grinder with a diamond blade is ideal for cutting granite surfaces. For a smoother finish, consider a wet cut method that uses water to cool the blade and reduce dust. For dry cutting, work slowly to prevent overheating and chipping.
- Start the Cut: Begin cutting along the cut line with steady, even pressure. Allow the tool to do the work without forcing it through the granite. Move slowly to ensure precision cuts and avoid damaging the natural stone.
- Safety First: Always wear safety goggles, gloves, and a dust mask to protect yourself from flying debris and fine granite dust.
4. Troubleshooting Uneven Cuts or Chips
If uneven edges or chips occur, they can be smoothed using polishing pads. Start with a coarse pad to even out rough areas, then progress to finer grits for a polished finish. Pay close attention to any sharp edges to maintain the integrity of the countertop.
Why Choose Stone Sealer Restoration?
We provide expert granite countertop cutting and restoration services. From achieving straight cuts to ensuring the surface looks flawless, our team uses advanced techniques and equipment to handle every project with care. Whether it’s a wet cut for a smooth edge or repairing chips on granite surfaces, we deliver professional results that exceed expectations.
By following this step-by-step guide and using the right tools, you can complete your granite countertop project with confidence. For those who prefer expert assistance, trust Stone Sealer Restoration to deliver the precision and quality your natural stone deserves.
How to Cut Granite with a Handheld Saw
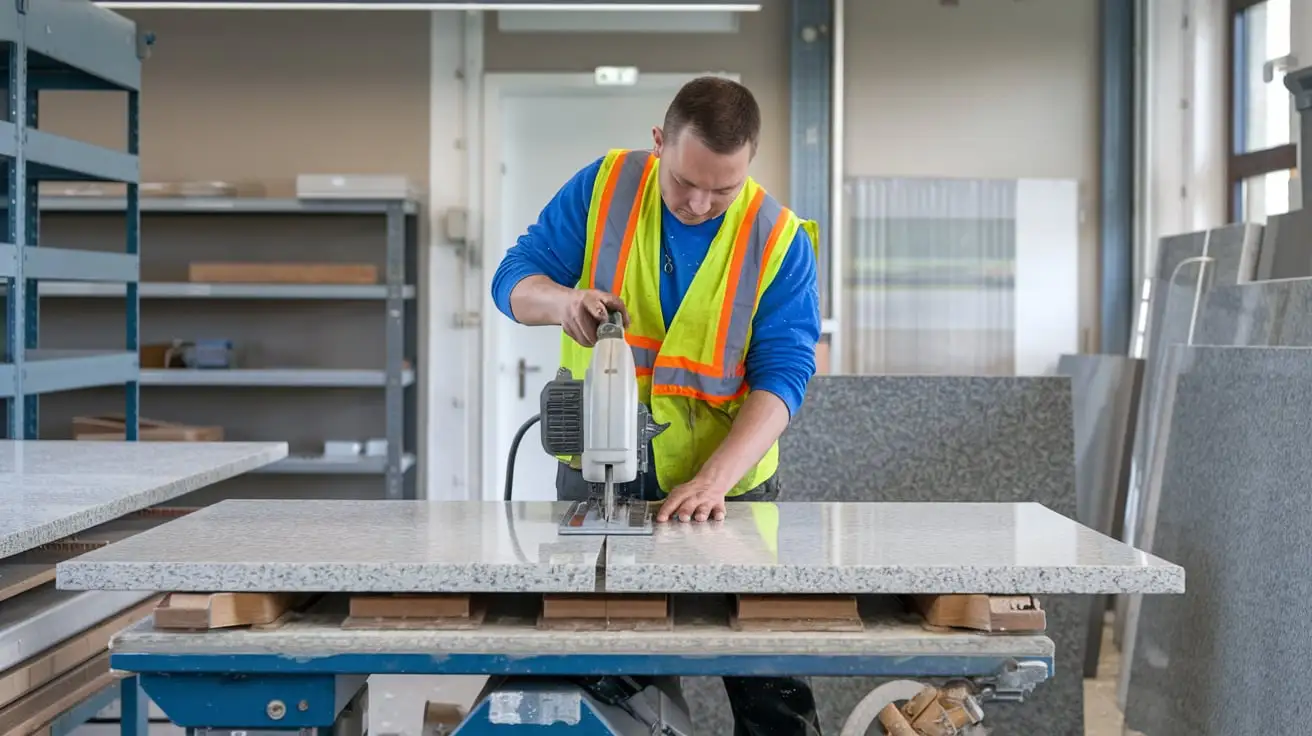
Cutting granite can be a challenging task, but using a handheld saw can make the process easier and more precise. With the right technique, this tool allows for flexibility and control, making it an ideal choice for DIYers working with granite slabs. Here’s a simplified guide to cutting granite with a handheld saw.
Advantages of Using a Handheld Saw
A handheld saw offers maneuverability, allowing you to make controlled cuts, especially in tight spaces. With the proper diamond blade, it can handle the toughness of granite, ensuring clean, precise cuts without the need for bulky machinery.
Techniques for Precision Cuts
- Choose the Right Blade: Use a diamond blade for effective cutting.
- Mark the Cut Line: Clearly mark your cut line with a pencil or chalk for accuracy.
- Secure the Granite: Clamp the granite slab firmly to avoid shifting during the cut.
- Cut Slowly: Apply steady, even pressure for straight cuts, allowing the saw to do the work.
- Wet Cutting: Use water to cool the blade and reduce dust during the cutting process.
Safety Tips
- Wear Safety Gear: Always wear safety goggles, gloves, and a dust mask.
- Check the Blade: Ensure the diamond blade is secure and in good condition.
- Work in a Ventilated Area: Cutting granite produces dust, so ensure proper ventilation or work outside.
Step-by-Step Process
- Prepare the Granite: Measure and mark your cutting line.
- Set Up the Workspace: Secure the granite slab with clamps.
- Start Cutting: Slowly guide the saw along the marked line, using even pressure.
- Check the Cut: After cutting, inspect the edges and smooth them with a polishing pad if needed.
Cutting granite with a handheld saw is achievable with the right preparation, tools, and techniques. By following these steps, you can achieve professional-looking results for your granite projects.
Can You Cut Granite Countertops After They Are Installed?
How to cut granite after installation is a common question for homeowners looking to make adjustments or modifications to their countertops. While it’s certainly possible to cut granite countertops once they are installed, it comes with specific challenges. Unlike cutting granite before installation, post-installation cutting requires precision, the right tools, and careful handling to avoid damage to both the countertop and surrounding areas.
Challenges of Cutting Installed Granite Countertops
When asking how to cut granite after installation, the biggest challenges include limited access to the edges, potential damage to surrounding tiles or cabinets, and the difficulty of maintaining a clean workspace. Unlike cutting raw granite slabs, post-installation cutting often involves tighter spaces and the risk of cracking or chipping the stone.
Tools and Techniques for On-Site Cutting
To successfully cut granite after installation, tools like an angle grinder or circular saw equipped with a diamond blade are essential. Using a wet cut method is highly recommended as it reduces dust, keeps the blade cool, and helps prevent cracks in the granite. A cutting guide or straightedge can help maintain precision for straight cuts.
Safety Considerations and Precautions
When figuring out how to cut granite safely after installation, it’s crucial to wear safety goggles, gloves, and a dust mask to protect yourself from debris and fine granite dust. Ensure your work area is well-ventilated and use protective covers to shield adjacent surfaces from dust and chips.
Common Scenarios for Post-Installation Modifications
Common reasons for cutting granite countertops after installation include making space for a new sink, adjusting the countertop for new appliances, or reshaping the edges. These modifications require careful cutting to ensure clean lines and prevent damage to the granite’s surface.
How to cut granite after installation is a process that requires the right tools, safety precautions, and expertise. While DIYers can attempt it, for the best results, it’s often wise to seek professional help to ensure the cuts are precise and the countertop remains undamaged.
How to Cut Granite for a Sink

Cutting granite for a sink cutout is a precise task that requires the right tools and techniques. If you’re wondering how to cut granite for a sink, it’s essential to follow the right steps to ensure a smooth, clean cut without damaging the stone. Whether you’re creating a circular or rectangular cutout, proper preparation and the right cutting method will help you achieve a perfect fit.
Preparing Granite for Sink Cutouts
Before starting, measure and mark the sink’s dimensions on the granite slab. Use a tape measure and a straightedge to outline the cut. For a more accurate mark, use masking tape along the cutting line to help prevent chips and cracks. Ensure the granite is securely clamped to a stable surface to prevent movement during cutting.
Tools and Techniques for Circular and Rectangular Cuts
To cut granite for a sink, you’ll need a diamond blade equipped with either a circular saw or angle grinder. For circular cuts, a core drill bit designed for granite is essential to create clean, rounded edges. For rectangular cutouts, use a straightedge as a guide and make slow, deliberate cuts to maintain precision. A wet cut technique helps reduce dust and keeps the blade cool, ensuring smoother cuts and a longer tool life.
Tips to Avoid Cracking During Sink Cutouts
To prevent cracking, always start your cuts from the edge, not the middle of the granite slab. Use a wet cut method to reduce heat and friction, which can cause stress cracks. Apply gentle pressure and avoid forcing the saw through the material. Additionally, scoring the cut line lightly with a diamond blade before making the full cut can help minimize cracking.
Step-by-Step Guide to a Perfect Sink Fit
- Measure and Mark: Use a tape measure to mark the sink’s outline on the granite.
- Secure the Granite: Clamp the granite slab to a stable, flat surface.
- Cut the Corners First: If making a rectangular cut, start by cutting the corners with a diamond blade, then cut along the straight edges.
- Make the Final Cut: For circular cuts, use a core drill bit to create the hole.
- Smooth the Edges: After cutting, use polishing pads to smooth out any rough edges and create a clean finish.
Learning how to cut granite for a sink requires patience and precision. By following the right steps, using the right tools, and taking necessary precautions, you can create a flawless sink cutout. For the best results, consider seeking professional help for a clean and perfect fit.
Granite Cutting Solutions with Stone Sealer Restoration
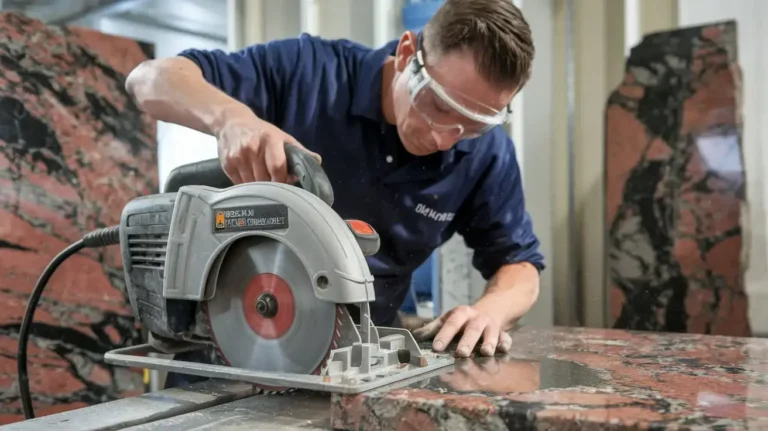
At Stone Sealer Restoration, we’re your go-to experts for complete granite cutting solutions and professional stone care. Whether you’re learning how to cut granite for the first time or need help preserving a newly cut surface, we’ve got you covered. Sealing your granite after cutting is just as important as the cutting process itself; it’s essential for protecting your investment and maintaining that beautiful, polished finish.
Why Sealing Granite Is Essential After Cutting
After you master how to cut granite, sealing is the next crucial step to ensure long-lasting protection and beauty. Cutting exposes the granite’s porous surface, leaving it vulnerable to stains, spills, and moisture absorption. A high-quality stone sealer from Stone Sealer Restoration locks in the natural beauty of your granite while providing a protective barrier that guards against damage and keeps your countertops looking pristine just like the most expensive marbles.
How to Apply Stone Sealer to Restore the Surface
The process of applying a stone sealer is simple, but the results are worth it:
- Clean the Surface Thoroughly: Before sealing, make sure the granite is free from dust or debris, especially after the cutting process.
- Apply the Sealer Evenly: Use a clean cloth or applicator to spread the sealer across the entire granite surface, focusing on the freshly cut edges.
- Allow the Sealer to Absorb: Let it sit for about 15-20 minutes, allowing the stone to absorb the sealer.
- Buff to Perfection: After the sealer has soaked in, buff the surface with a soft cloth to restore the granite’s natural luster and shine.
Tips for Maintaining Granite’s Polished Appearance
Once you’ve learned how to cut granite and sealed it, keeping it looking like new is easy:
- Regular Cleaning: Wipe down your granite with a mild cleaner and soft cloth to keep it free from dirt and grime.
- Immediate Spill Cleanup: Clean up spills right away, especially oils or acidic substances, to prevent staining.
- Reapply Sealer: After time, reseal your granite to ensure continued protection—typically every 1-2 years or whenever water no longer beads on the surface.
Professional-Grade Stone Sealers for Maximum Protection
For unbeatable results, trust Stone Sealer Restoration for your sealing needs. Our professional grade stone sealers provide superior protection against stains, scratches, and moisture, ensuring your granite countertops maintain their flawless appearance for years. With our products, you can rest easy knowing your granite is shielded from the wear and tear of daily life.
We specialize in premium granite cutting solutions and stone care that enhances and protects your countertops. Whether you’re learning how to cut granite or need expert help with sealing and maintaining your surfaces, our team is here to help. Get in touch today to learn how we can restore, protect, and preserve your granite for a lifetime of beauty!
Final Thoughts
In this guide, we’ve covered everything you need to know about how to cut granite from preparation to cutting techniques, and the importance of sealing. Proper methods ensure clean, precise cuts and protect the beauty of your granite for years to come.
Remember, safety is key! Always use the right tools and take your time. Don’t forget that sealing your granite is essential to prevent stains and maintain its polished finish.
For long-lasting granite care, regular cleaning and resealing are a must. At Stone Sealer Restoration, we specialize in both granite cutting and professional sealing services.
Ready to protect your granite and make it shine? Contact Stone Sealer Restoration today for expert advice and services!

