
How to Fix Concrete Floor Damage Before It Gets Worse
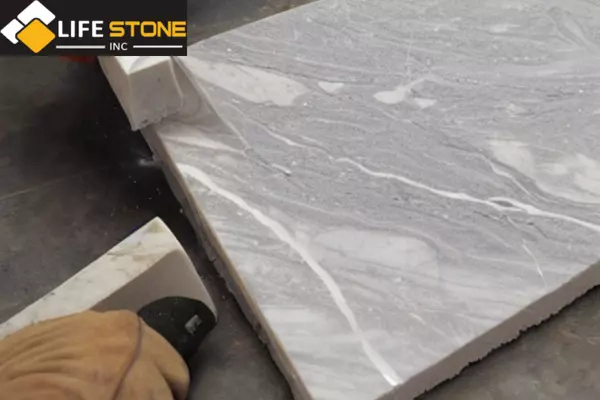
Concrete floors often crack, sink, and crumble over time. What begins as a hairline fracture can quickly progress into a costly structural issue, requiring thousands to repair. Property owners sometimes wait too long before taking steps to address small cracks; when water seeps into these cracks, and freeze-thaw cycles widen gaps beyond repair, something which should have been easily patched becomes necessary replacement instead. Learning how to fix concrete floor damage early saves money and prevents bigger headaches. From basement moisture issues, uneven settling or surface wear, finding an appropriate repair method depends on its nature and severity; Stone Sealer Restoration works regularly with property owners experiencing these challenges – early intervention stops minor damages becoming major failure. Why Concrete Floors Fail Concrete doesn’t just crack randomly. Damage happens when the material experiences stress it wasn’t designed to handle. Understanding the cause helps you choose the right repair and prevent recurrence. Common causes of damage: Shrinkage during curing: Concrete shrinks as it dries. If the slab cures too quickly or lacks proper control joints, cracks form. Settlement and soil movement: When the ground beneath a slab shifts or compresses unevenly, the concrete sinks or breaks. Freeze-thaw cycles: Water enters small cracks, freezes, expands, and breaks the concrete apart from the inside. Overloading: Floors designed for light use fail when subjected to heavy equipment or storage. Moisture intrusion: Water weakens concrete over time, especially in basements where hydrostatic pressure pushes moisture through the slab. Basements see the worst of it. Poor drainage, high water tables, and inadequate vapor barriers create conditions where concrete crack repair becomes a recurring issue. How to fix concrete floor without addressing the moisture source leads to repeated failure. How to Identify the Type of Concrete Damage Not all cracks are the same. Understanding how to repair uneven concrete floor sections versus hairline fractures requires recognizing different damage types. The repair method that works for a hairline fracture won’t hold up against a structural gap or a sunken section. Hairline Cracks These run less than 1/8 inch wide and don’t move. They’re usually cosmetic but can let moisture through. A quality crack and hole filling product works here, especially epoxy or polyurethane-based sealants that bond to both sides of the crack. Structural Cracks Wider than 1/4 inch, often accompanied by vertical displacement or continued movement. These indicate foundation issues or severe settlement. Structural concrete repair for cracks this large requires epoxy injection or routing and sealing. If the crack keeps widening, professional evaluation is necessary. Spalling and Surface Damage This shows up as flaking, pitting, or chunks breaking off the surface. Freeze-thaw damage and chemical exposure cause this. Concrete resurfacing products that include bonding agents restore the surface and protect against further abrasion. Uneven or Sunken Slabs When sections of a floor sit lower than the rest, it’s usually due to soil settlement. Knowing how to level a sinking concrete surface requires lifting the slab back into place, often using polyurethane foam injection or mudjacking. Floor patching won’t solve the problem because the underlying support is compromised. Step-by-Step Process: How to Fix Concrete Floor Cracks Repairing cracks properly means preparing the surface, choosing the right material, and applying it correctly. Skipping steps leads to failure. Here’s how to fill concrete floor cracks step by step. 1. Clean the crack thoroughly Remove all loose debris, dust, and old filler. Use a wire brush, shop vacuum, or compressed air. If the crack has oil or grease, clean it with a degreaser. The repair material won’t bond to dirty concrete. 2. Widen narrow cracks if necessary Hairline cracks often need widening to allow proper filler penetration. Use a grinder or chisel to create a V-shaped groove. This gives the patching material more surface area to grip. 3. Apply a bonding agent For wider cracks or areas where the concrete is old and porous, a bonding agent improves adhesion. Brush or spray it into the crack and let it tack up before adding the main filler. 4. Fill the crack with the appropriate material Epoxy: Best for structural repairs. High strength, bonds aggressively, works well for cracks that bear load. Polyurethane: Flexible, handles movement better than epoxy. Good for slab repair where slight shifting occurs. Concrete patch compound: Works for shallow cracks and surface damage. Easier to work with but less durable under stress. Pour or inject the material, making sure it fills the entire depth. Overfill slightly, then smooth it level with the surrounding surface. 5. Cure and protect Follow the manufacturer’s cure time. Most products need 24 to 48 hours before foot traffic. For heavy use areas, wait longer. Seal the repaired area with a penetrating sealer to protect against moisture and wear. How to Fix Concrete Floor Sections with Concrete Leveling Sunken slabs create trip hazards and drainage problems. Water pools in low spots, accelerating damage. Replacing the slab is expensive and disruptive. Lifting it back into place costs less and takes less time. Mudjacking This traditional method pumps a slurry of cement, sand, and water beneath the slab. The mixture fills voids and raises the concrete. It’s effective but adds weight, which can cause future settling if the soil underneath is weak. Polyurethane Foam Injection A newer approach that injects expanding foam beneath the slab. The foam is lightweight, expands quickly, and stabilizes the soil. It’s more expensive than mudjacking but often more reliable, especially in wet or unstable ground. Both methods require drilling holes through the slab, injecting the material, and monitoring the lift to avoid over-correction. This isn’t a DIY project unless you have experience with the equipment. How to Resurface a Concrete Floor with Extensive Damage When the surface is pitted, cracked in multiple places, or worn down from abrasion, knowing how to patch holes in concrete individually doesn’t make sense. Concrete resurfacing applies a new layer over the existing slab, restoring both appearance and durability. Resurfacing makes sense when multiple cracks spread across the floor, the surface layer has flaked or spalled